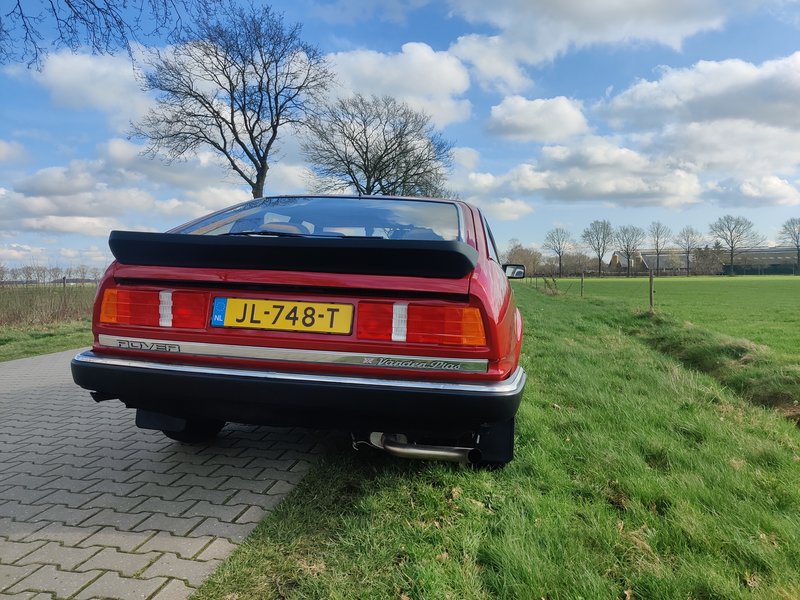
Only joking, looks great and a very good job of fitting too! You'll maybe have to upgrade the tailgate gas struts though, to cope with the extra weight of the spoiler.
1982 Rover 3500 V8 Vanden Plas automatic.
-
scoobyh123
- Rover Guru
- Posts: 12156
- Joined: Sat Jul 11, 2009 10:27 pm
- Location: Next door to Top Gun, Suffolk
- Contact:
Re: 1982 Rover 3500 V8 Vanden Plas automatic.
You've fitted it upside down Marc! 


Only joking, looks great and a very good job of fitting too! You'll maybe have to upgrade the tailgate gas struts though, to cope with the extra weight of the spoiler.
Only joking, looks great and a very good job of fitting too! You'll maybe have to upgrade the tailgate gas struts though, to cope with the extra weight of the spoiler.
Cheers,
Dave
'02 Honda CR-V SE Executive
'99 Jag S Type 3.0 V6 SE
'94 827 Sterling saloon
'88 Volvo 760 V6 Estate
'95 827 Coupé LPG gone but not forgotten!
Dave
'02 Honda CR-V SE Executive
'99 Jag S Type 3.0 V6 SE
'94 827 Sterling saloon
'88 Volvo 760 V6 Estate
'95 827 Coupé LPG gone but not forgotten!
-
820Vitesse

- Regular Visitor
- Posts: 395
- Joined: Mon Jan 05, 2015 10:24 pm [phpBB Debug] PHP Warning: in file [ROOT]/vendor/twig/twig/lib/Twig/Extension/Core.php on line 1266: count(): Parameter must be an array or an object that implements Countable
Re: 1982 Rover 3500 V8 Vanden Plas automatic.
Nice job, it is a bit scarey that moment you have to drill the first hole, no going back and it has to be correct. Looks good
-
scoobyh123
- Rover Guru
- Posts: 12156
- Joined: Sat Jul 11, 2009 10:27 pm
- Location: Next door to Top Gun, Suffolk
- Contact:
Re: 1982 Rover 3500 V8 Vanden Plas automatic.
I forgot that bit - i fitted a similar spoiler to my Cavalier Coupe (think Manta B) about 35 years ago. Took a big sheet of paper (like brown wrapping paper from a roll) when i went to remove the spoiler in the yard. Once removed, i shut the boot lid and taped the paper to the bodywork so it didn't blow away or move then used a pencil to rub over the edges of the body, boot lid and holes - perfect template for drilling!820Vitesse wrote: ↑Tue Oct 17, 2023 11:41 amNice job, it is a bit scarey that moment you have to drill the first hole, no going back and it has to be correct. Looks good
Cheers,
Dave
'02 Honda CR-V SE Executive
'99 Jag S Type 3.0 V6 SE
'94 827 Sterling saloon
'88 Volvo 760 V6 Estate
'95 827 Coupé LPG gone but not forgotten!
Dave
'02 Honda CR-V SE Executive
'99 Jag S Type 3.0 V6 SE
'94 827 Sterling saloon
'88 Volvo 760 V6 Estate
'95 827 Coupé LPG gone but not forgotten!
-
Marc-827-Vitesse
- Rover Guru
- Posts: 730
- Joined: Sun Feb 24, 2013 12:42 pm
- Location: Netherlands. [phpBB Debug] PHP Warning: in file [ROOT]/vendor/twig/twig/lib/Twig/Extension/Core.php on line 1266: count(): Parameter must be an array or an object that implements Countable
Re: 1982 Rover 3500 V8 Vanden Plas automatic.
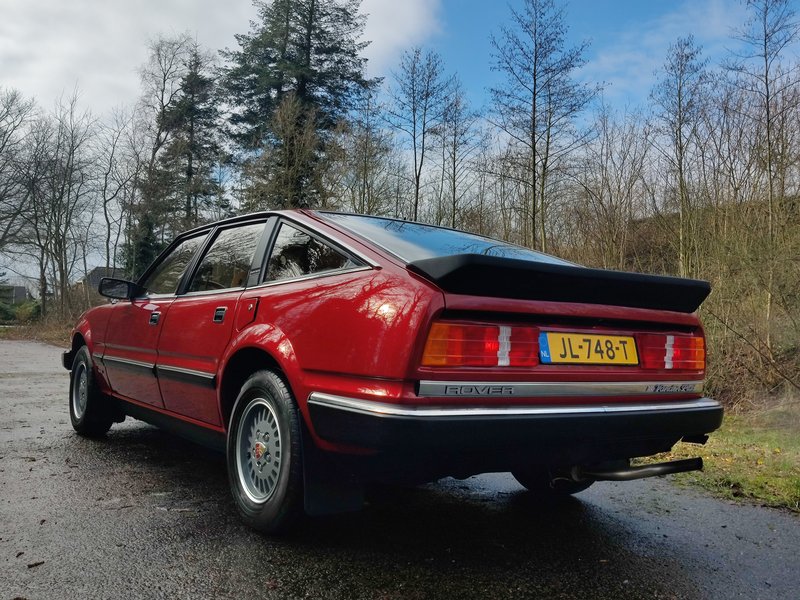
Thanks guys!! Haha luckily it is the right way up Dave. 
It was a strange moment to drill holes indeed. But, then again, you can't really make a big mistake because the spoiler hides the holes.
Hey that is also a smart way to do it Dave!
Thanks again!
It was a strange moment to drill holes indeed. But, then again, you can't really make a big mistake because the spoiler hides the holes.
Hey that is also a smart way to do it Dave!
Thanks again!
1989 Rover 827 Vitesse.
1982 Rover 3500 Vanden Plas.
1982 Rover 3500 Vanden Plas.
-
Lodein
- Regular Visitor
- Posts: 452
- Joined: Tue Jul 21, 2020 4:55 pm
- Location: Angoulême / France [phpBB Debug] PHP Warning: in file [ROOT]/vendor/twig/twig/lib/Twig/Extension/Core.php on line 1266: count(): Parameter must be an array or an object that implements Countable
Re: 1982 Rover 3500 V8 Vanden Plas automatic.
Very good job Marc.
Your SD1 with the rear spoiler is beautiful
Lodein
Your SD1 with the rear spoiler is beautiful
Lodein
Rover 827 Sterling Option Pack 1989 (Non Cat / Manual)
-
Marc-827-Vitesse
- Rover Guru
- Posts: 730
- Joined: Sun Feb 24, 2013 12:42 pm
- Location: Netherlands. [phpBB Debug] PHP Warning: in file [ROOT]/vendor/twig/twig/lib/Twig/Extension/Core.php on line 1266: count(): Parameter must be an array or an object that implements Countable
Re: 1982 Rover 3500 V8 Vanden Plas automatic.
Thanks Lodein!
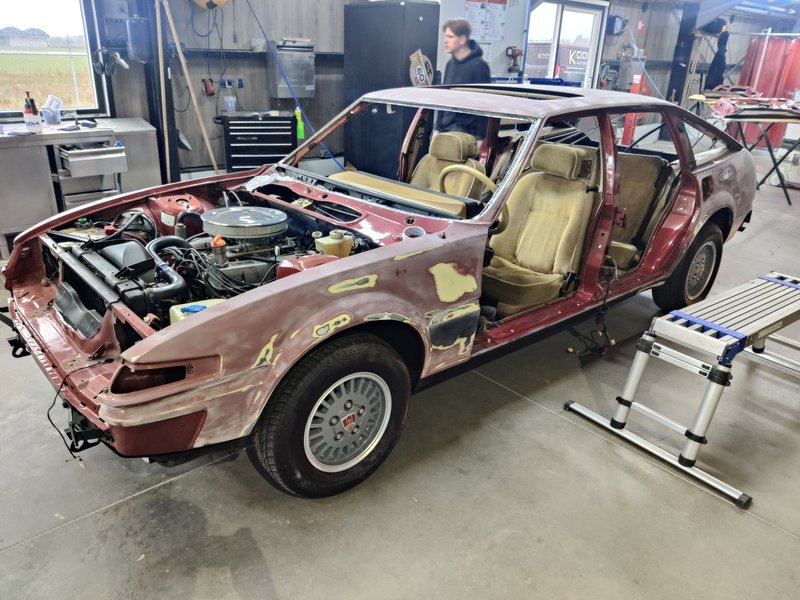
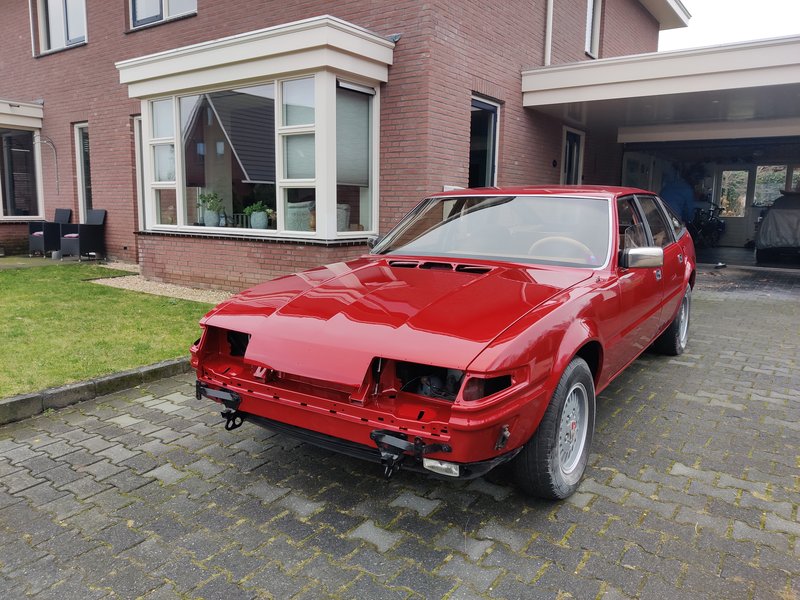
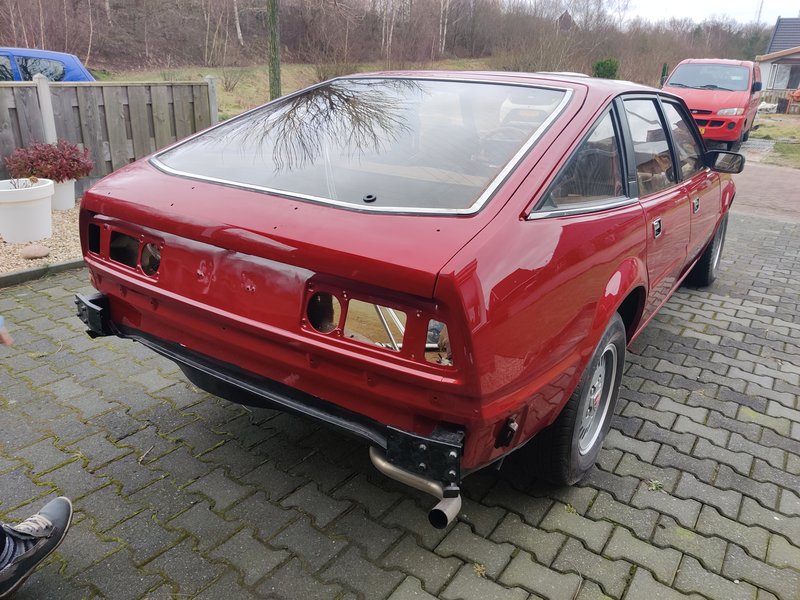
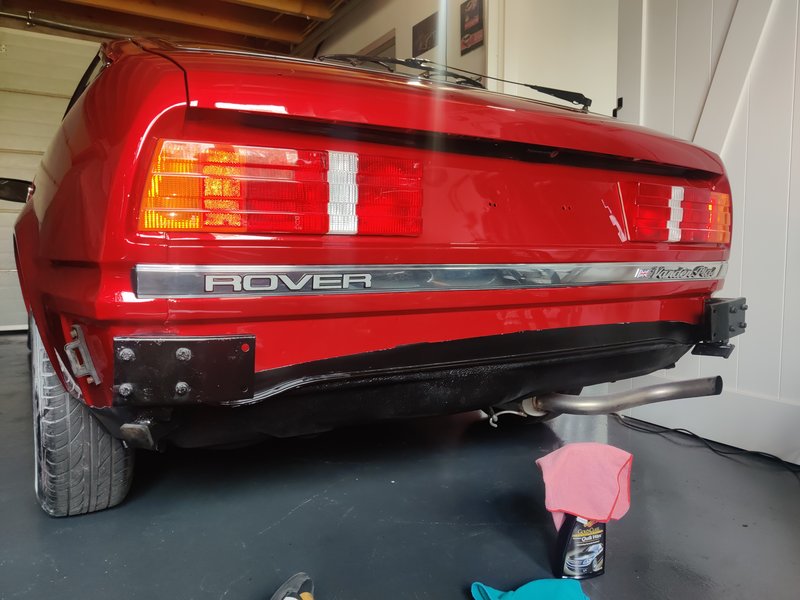
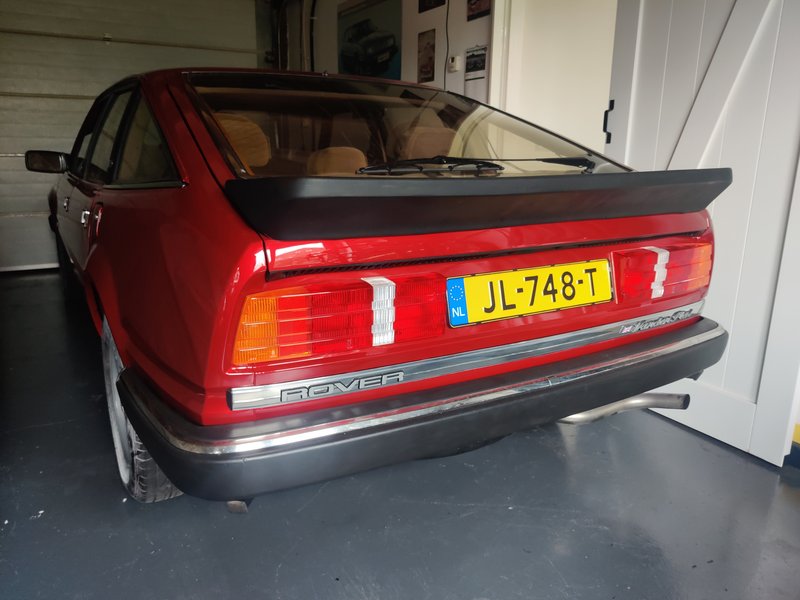
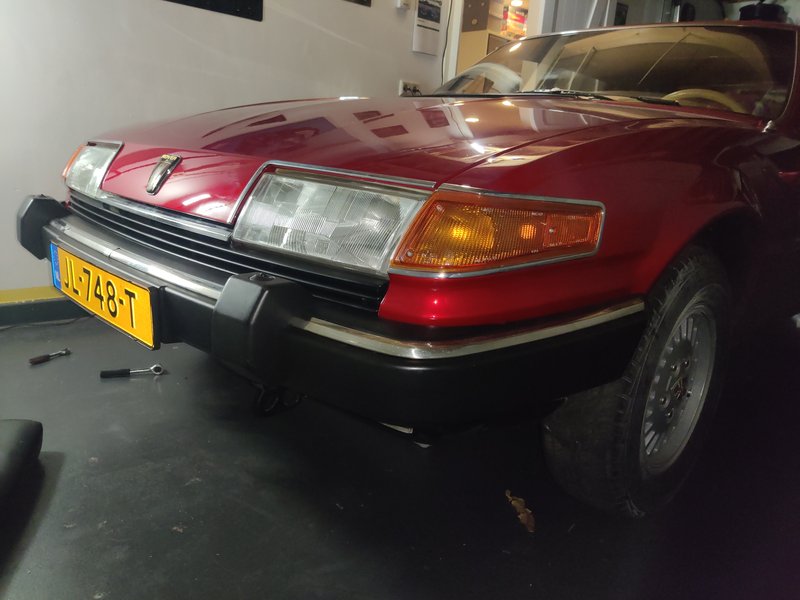
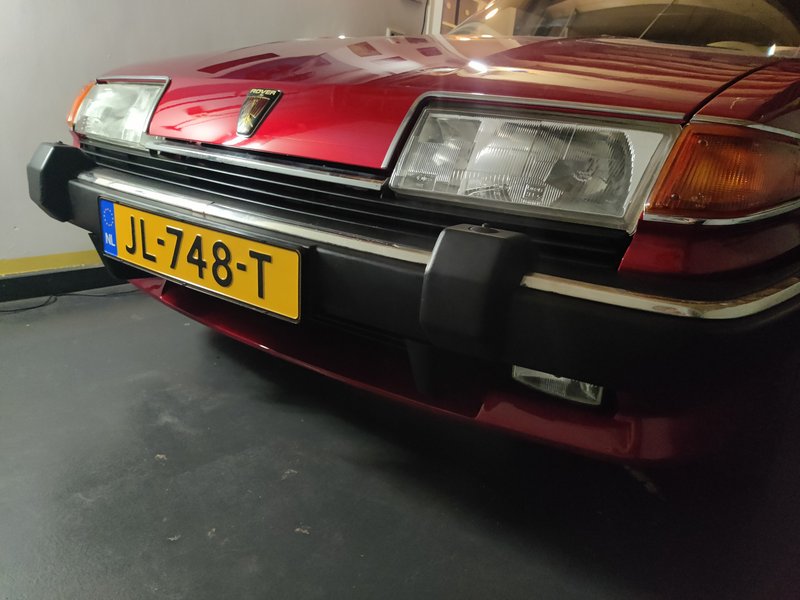
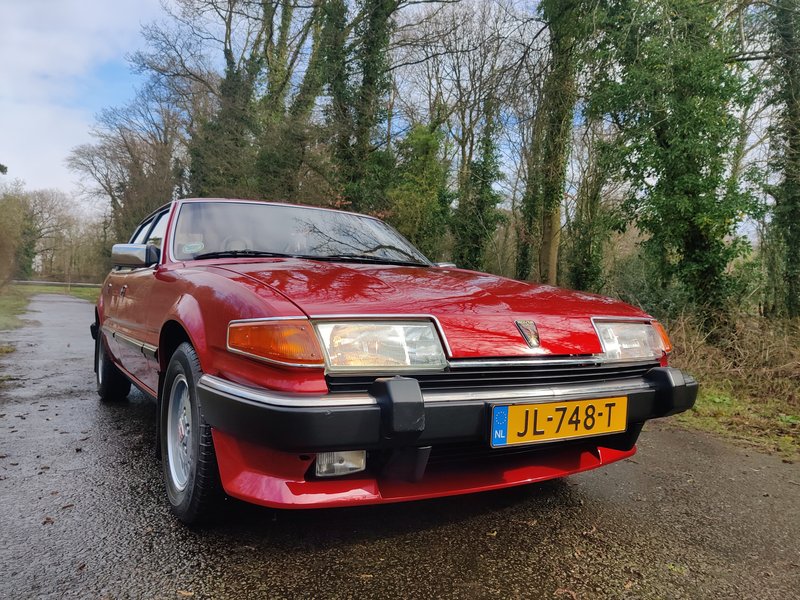
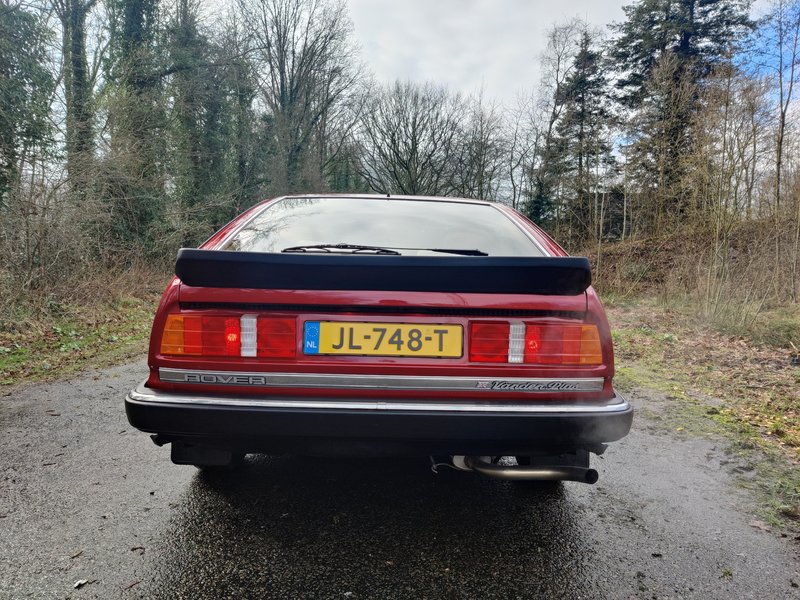
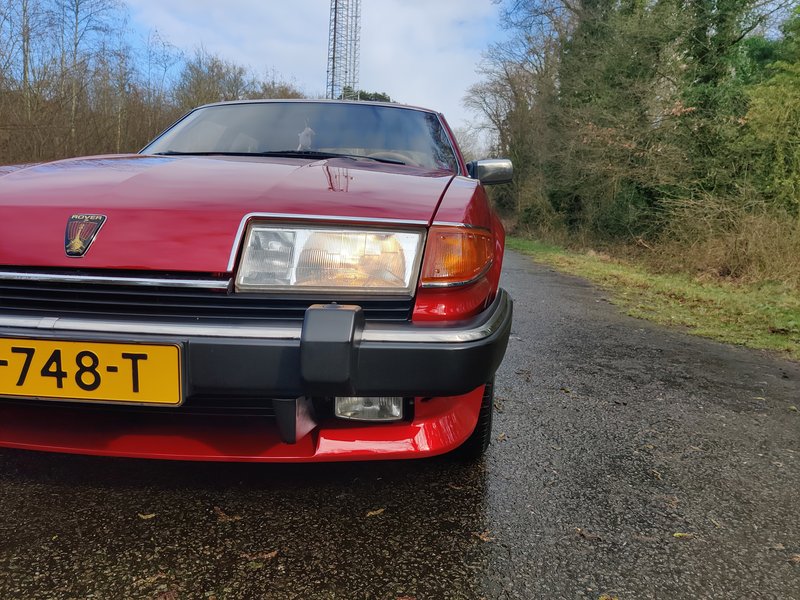
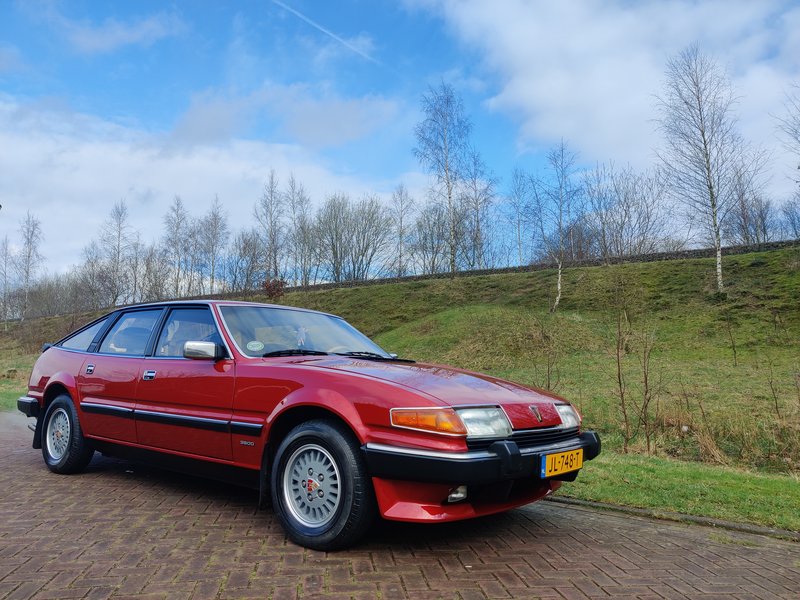
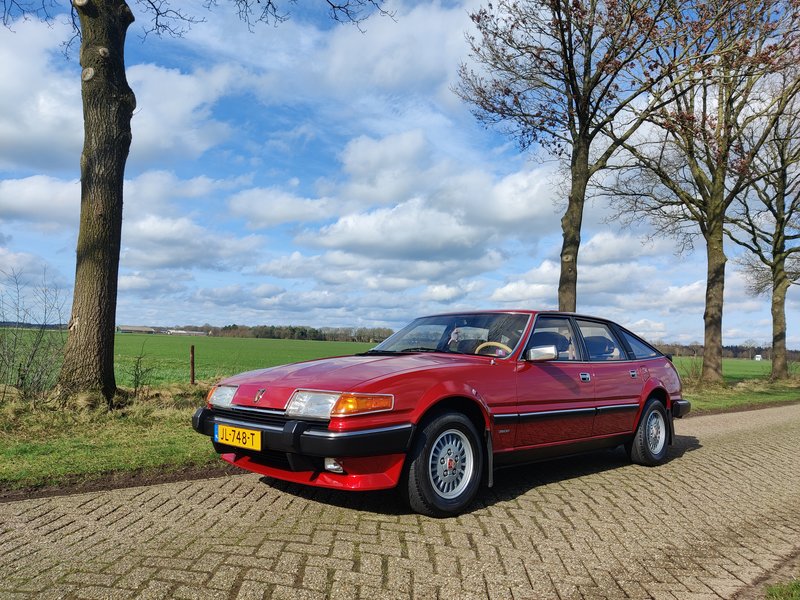
This winter i took the chance to take on a big project. Respray/restore the Rover SD1 Vanden Plas!
People who know my SD1 know that it was a pretty well sorted car. Fresh, good running and enjoyed! But it had 50 shades of red. Besides that, there was some rust spots here and there, some dents and paint blisters on the rear right-side door.
Not an strange list for a 40 year old car i know but even though i love originality, i prefer a fresh look. And my Rover has been touched up anyway so it has been on my mind since i bought it and brought it to the Netherlands.
I talked to my boss and he was oke with me tackling the project. With the help of colleagues of course.
This was the colour i/we decided on:
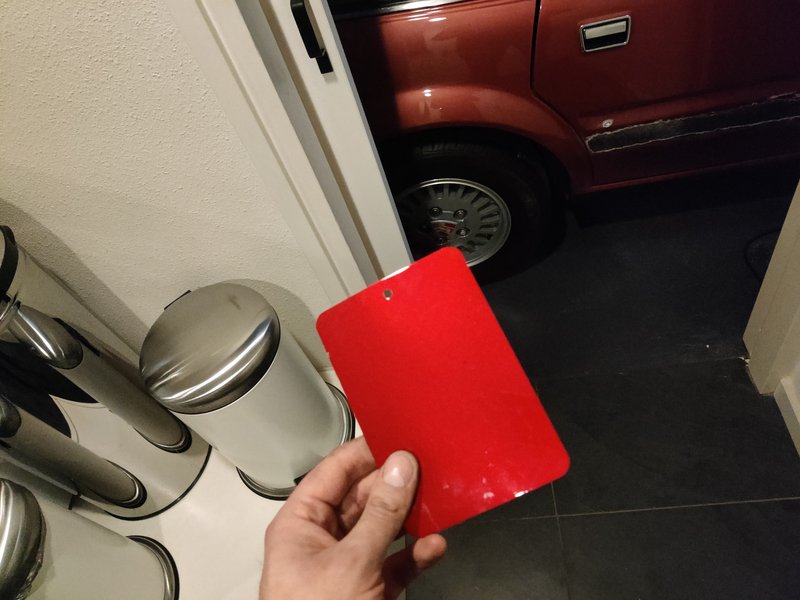
Yes, indeed that is not the original Oporto. Don't get me wrong, i love originality but to be honest i was never a huge fan of the Oporto red. In my opinion it lacked the depth and vibrant properties i look for, Especially on a classic car with lots of chrome. The series II was sold with three red colours. Monza (non-metallic orange-red), Targa (non-metallic red) and Oporto (metallic red). I wanted Metallic but as said. More to my liking. It was going to be a big project so better choose a colour i like!
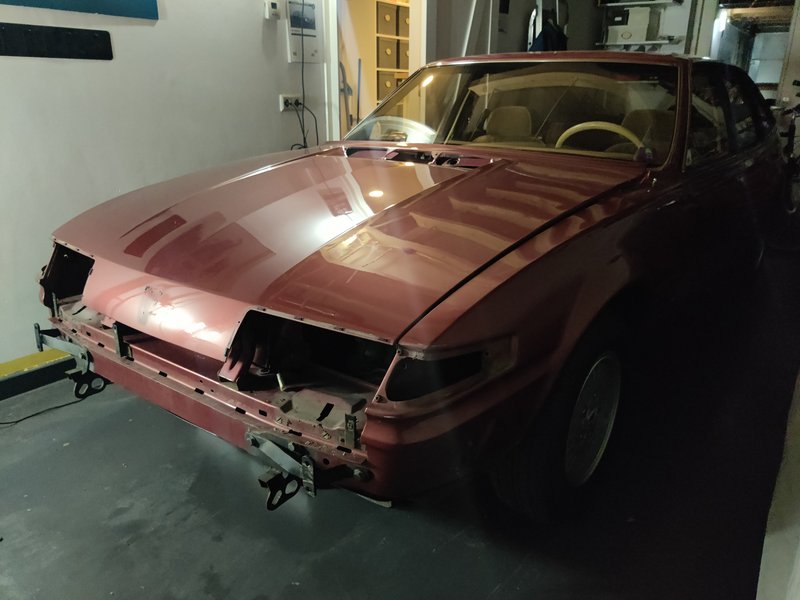
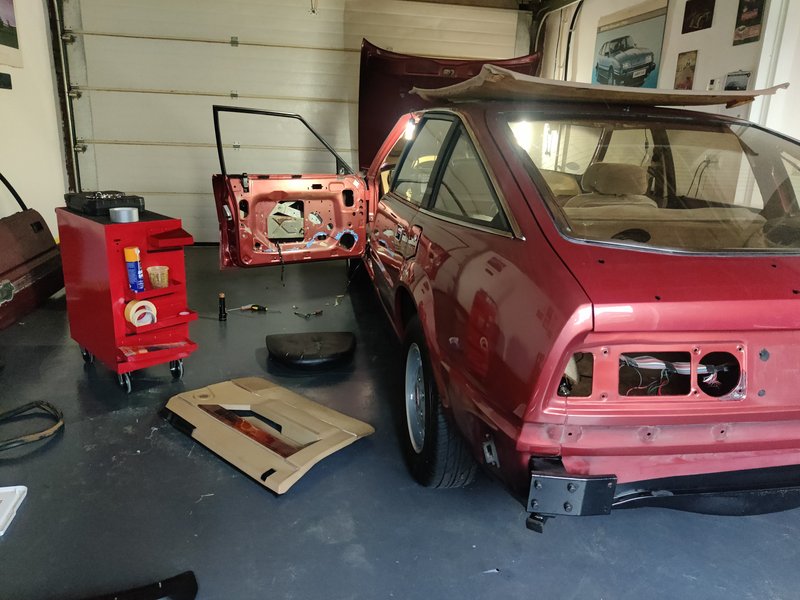
Started to take the Rover SD1 apart at home as far as possible:
When i bought the 3500 in Switzerland back in 2016 my friend and i replaced the left front door with a 2nd hand one. The outer skin of the original one had a rust spot on it. The replacement one did not and was in oporto red. So decided to change them out. But, luckily took the original one with me. The replacement door had bad seams, dents, scratches but the original one only the rust spot and a big dent. But that one was structurally sound. So i decided to put back the original one:
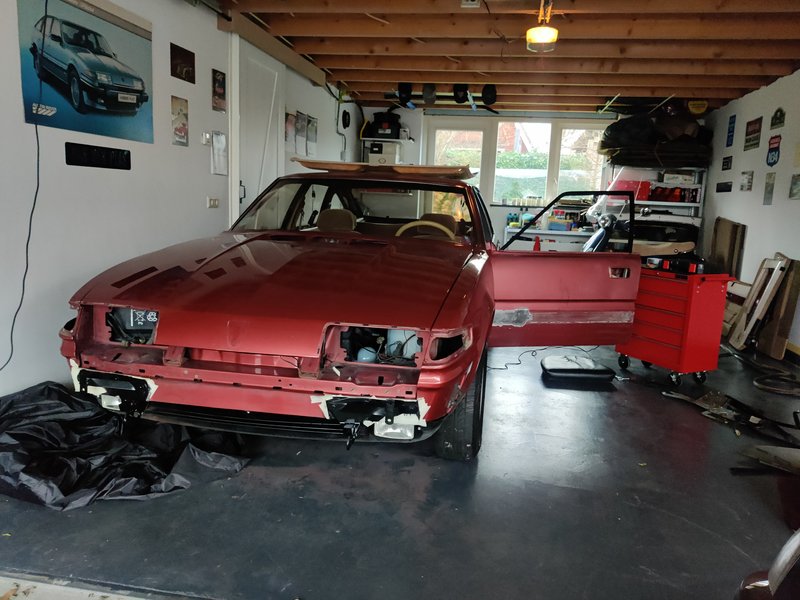
Yes, the 827 Vitesse had to come out briefly:
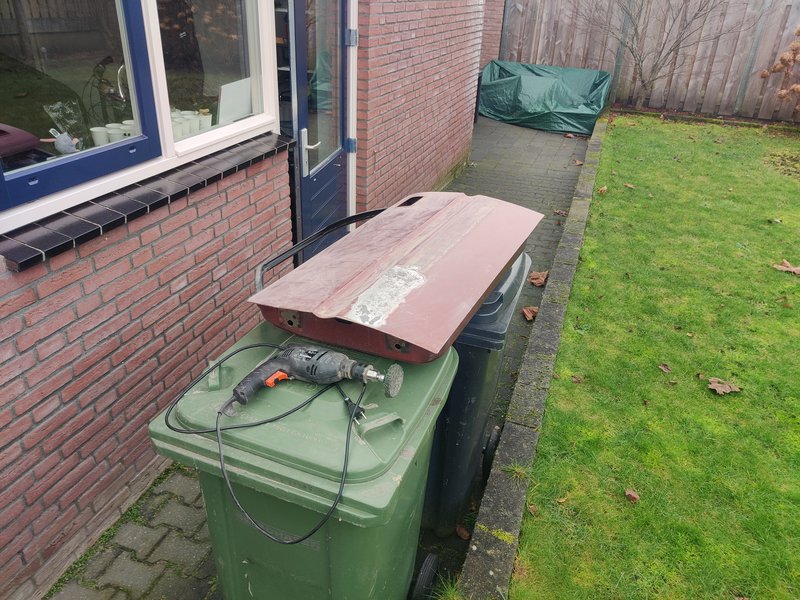
Removed dents from the bonnet with the glue system and removed the large dent under the right tail light with bodyshop tools:

Then to my work to commence with the disassembly and the project:
My work was the disassembly, metal/bodywork and rust removal. My mates would help out with the filler and sanding and the painting. And some difficult things like the windshield etc.
The right front and left rear door were quite good:

Left front welded in the hole. Cleaned the inside of rust as well:
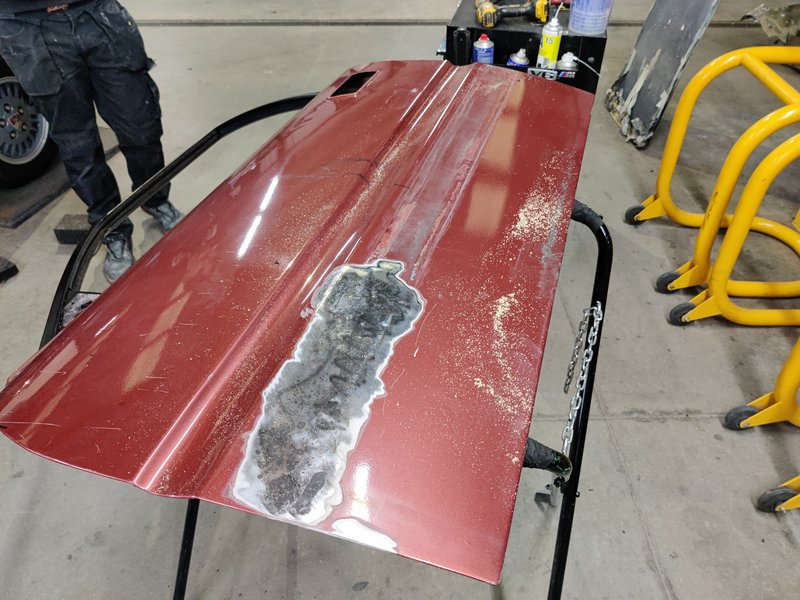
The right side rear door was so bad in terms of paint, we wanted to start fresh and find out what the issue was. Turned out it was bad filler application after a repair:
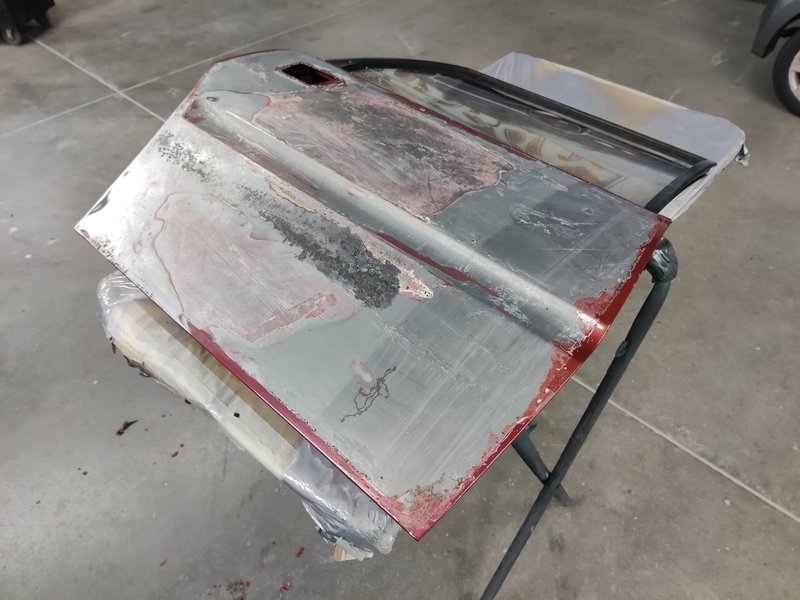
With some doors the lower seams were rusted or started to bulge a bit. Were needed i removed the top layer of steel so i was certain the rust was gone:
After this, cleaned out the inside of the doors with de greaser and rags and scotched the inner side that will receive paint:
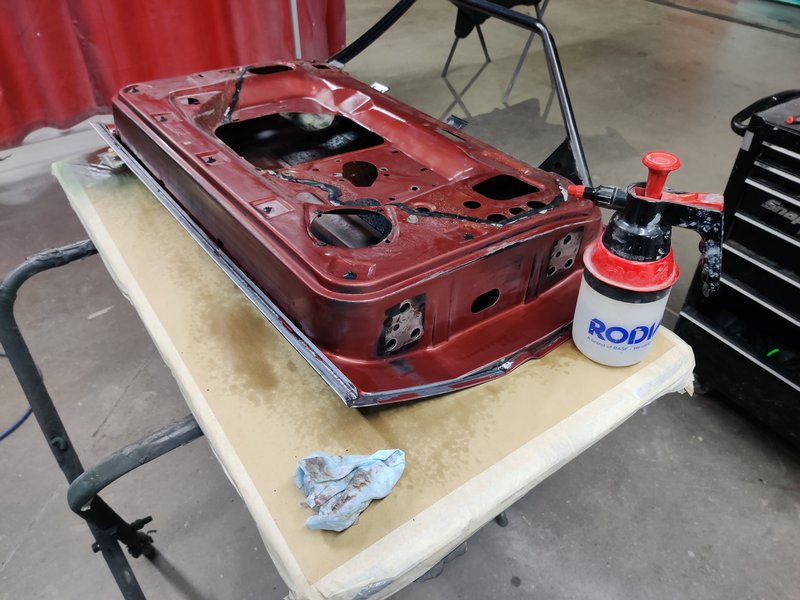
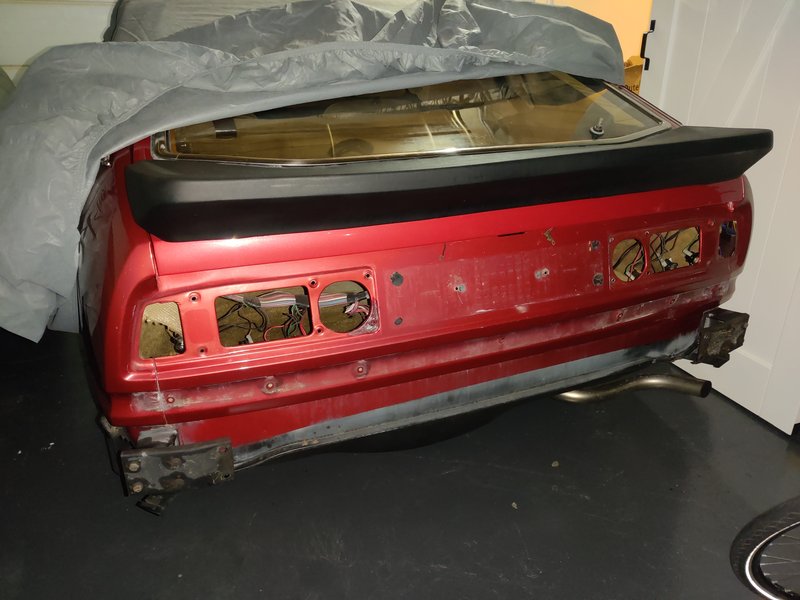
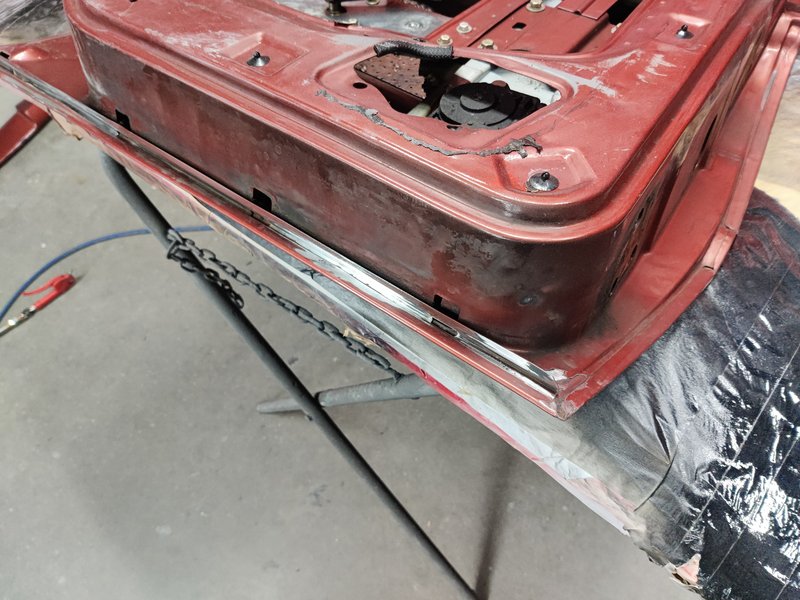
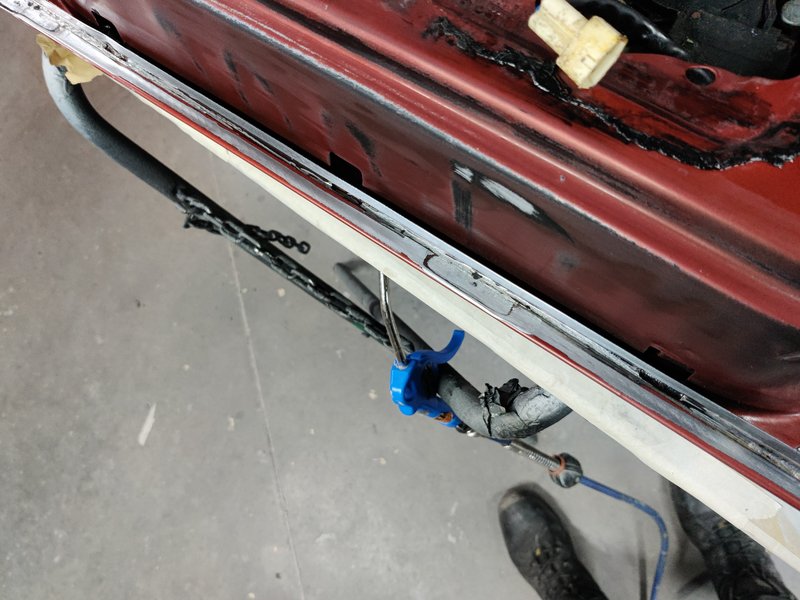
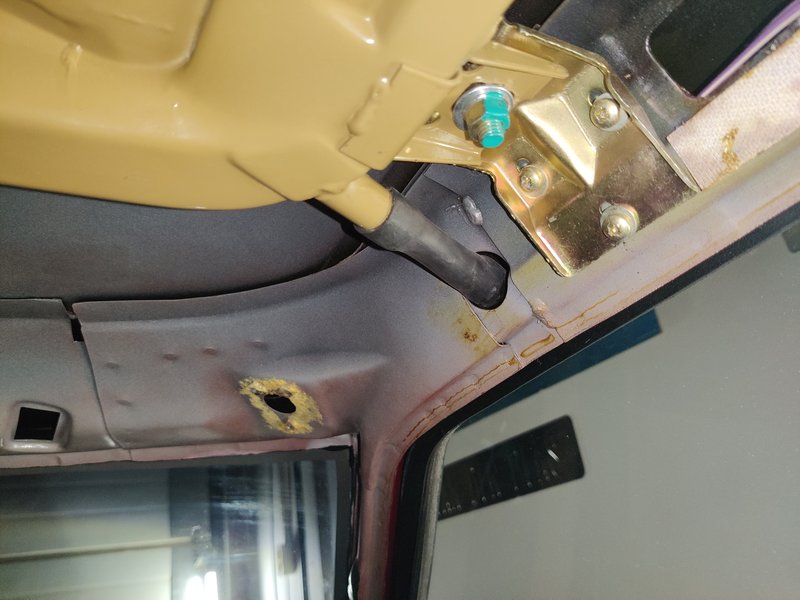
The bonnet and tailgate received the same treatment. The tailgate needed some minor holes welded.
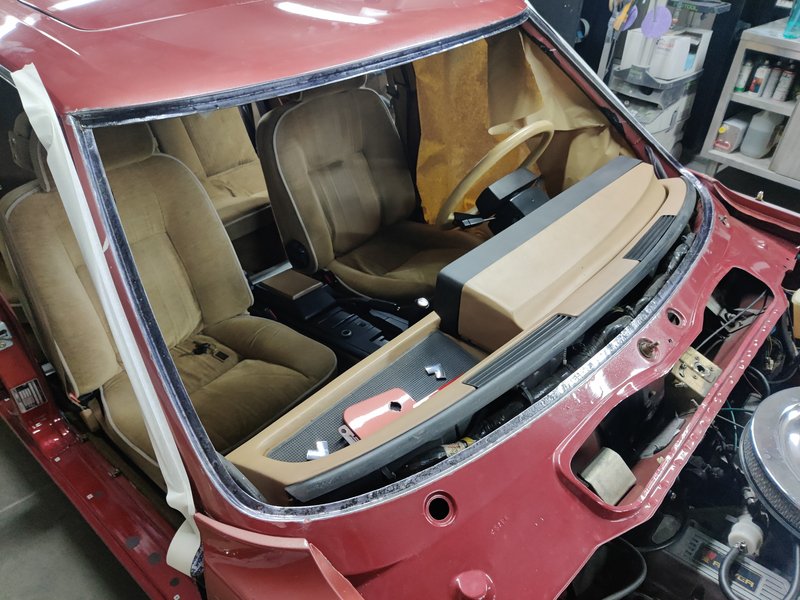
We also took out the front window because i wanted to clean it all. Just in the nick of time! I could clean it all out with tools but it would not have survived for five more years i think. All cleaned to bare metal and treated with rust converter. So now in the clear i hope!:
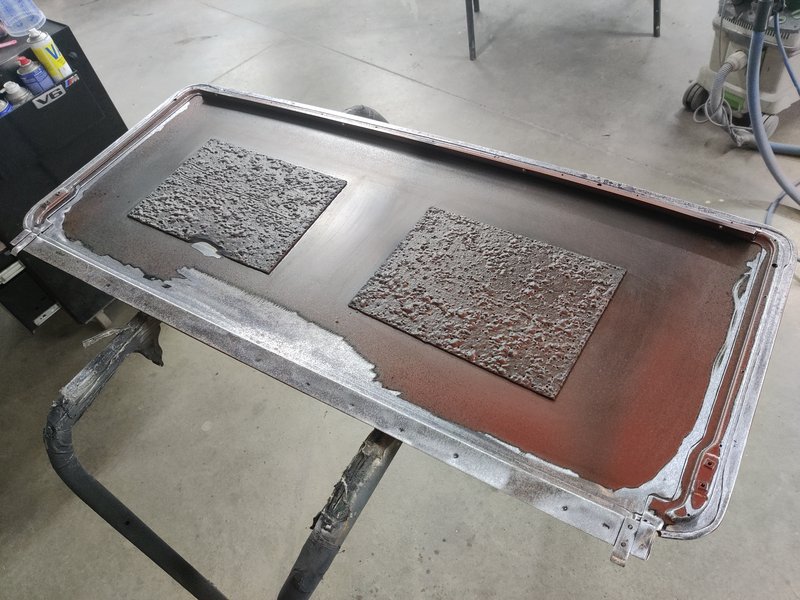
De rusted the sun roof plate:
When i looked at the car at this point, the size of the project did hit me:
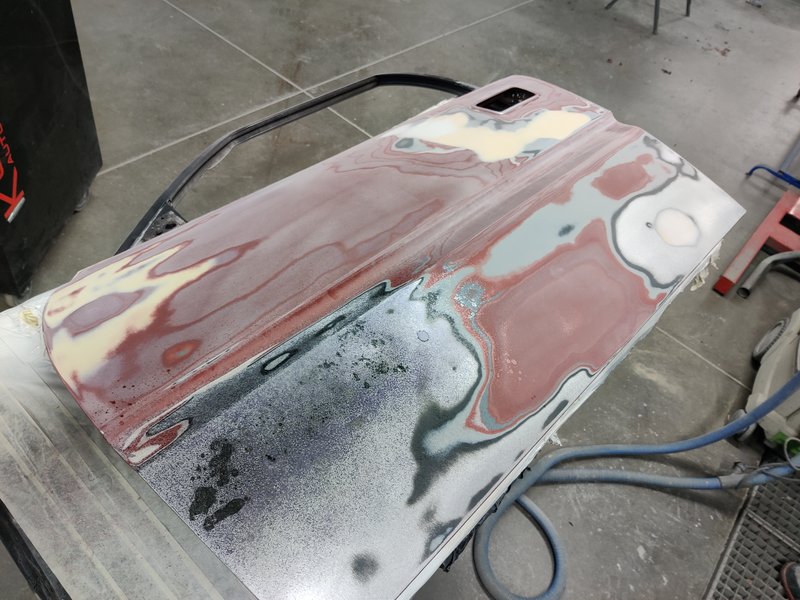
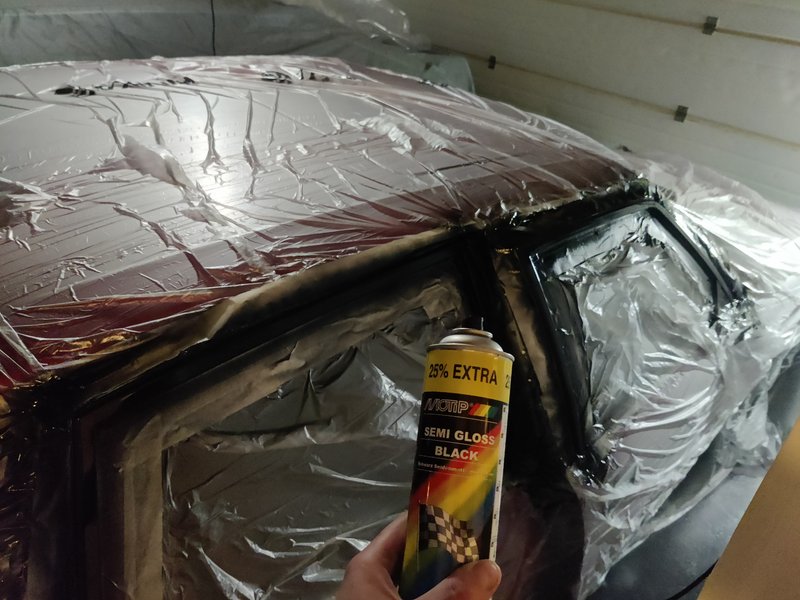
Proceed! The car in blocking/sanding paint:
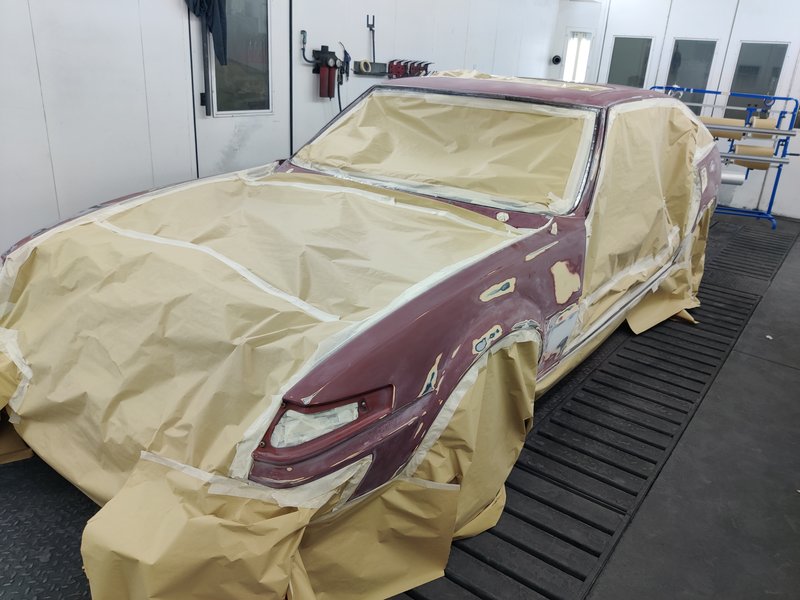
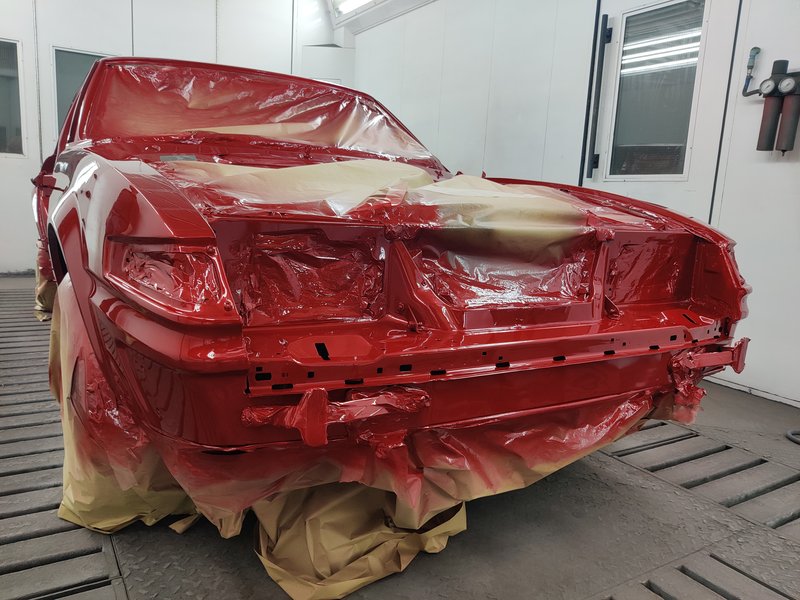
After the sanding steps, seam sealing, degreasing it was time for the big day!:
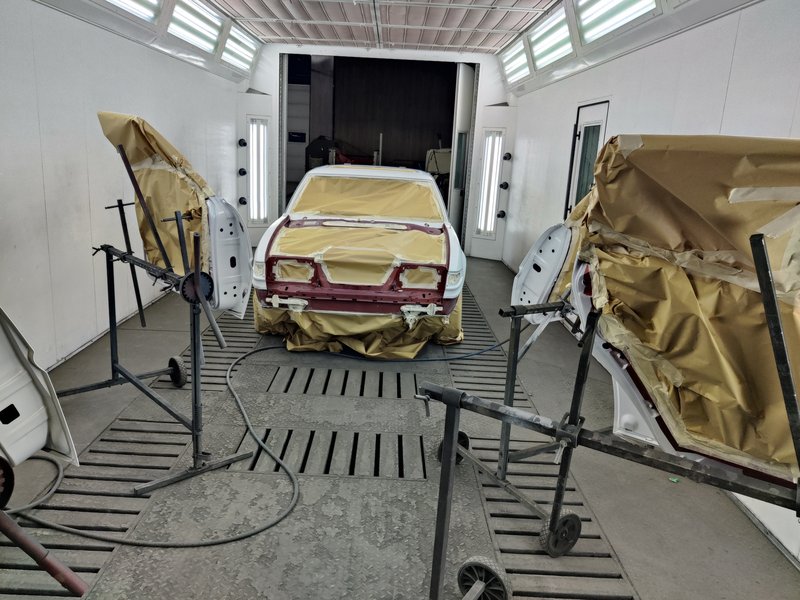
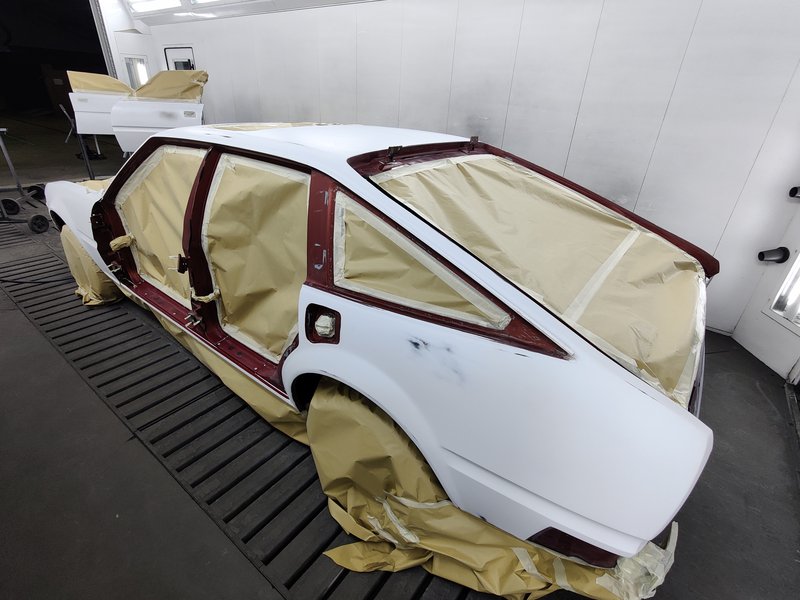
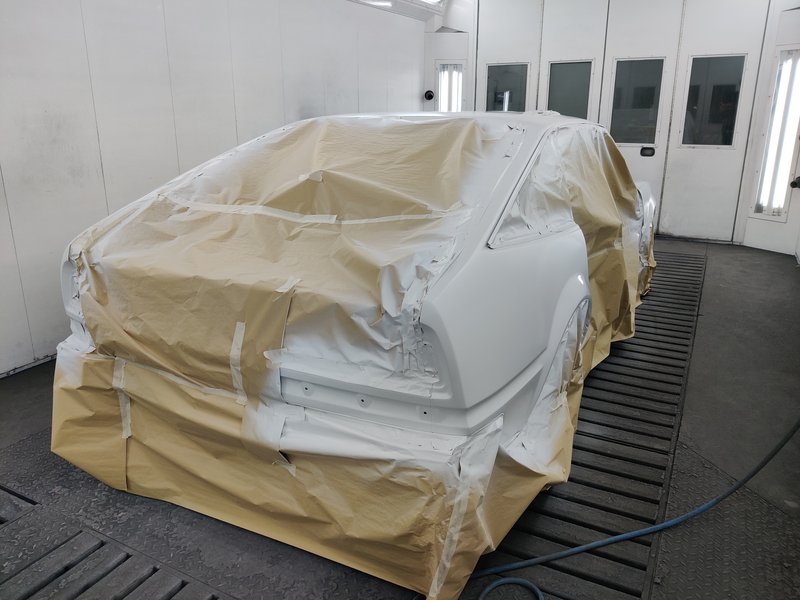
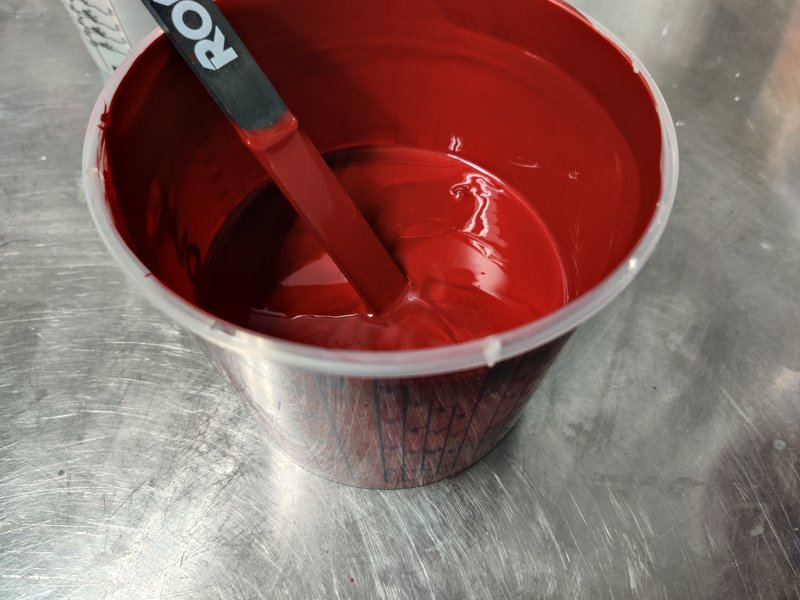
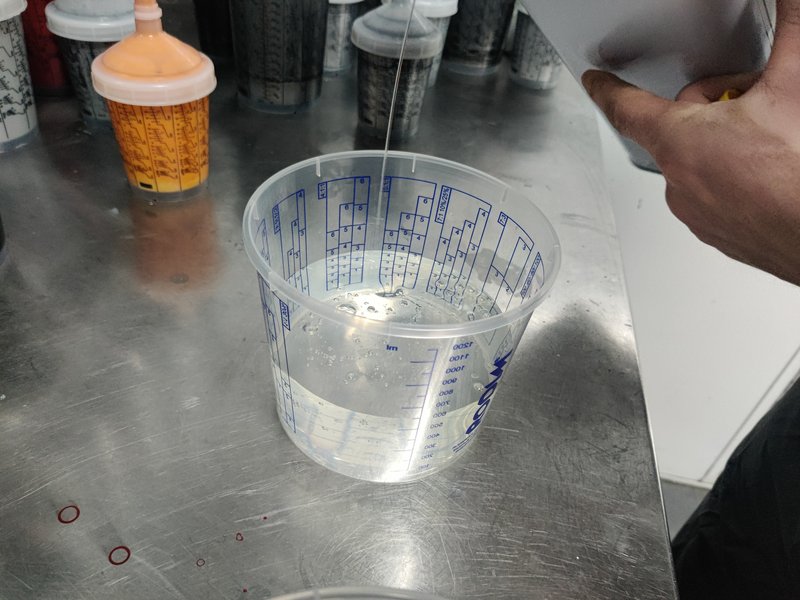
The colour:
Clear coat:
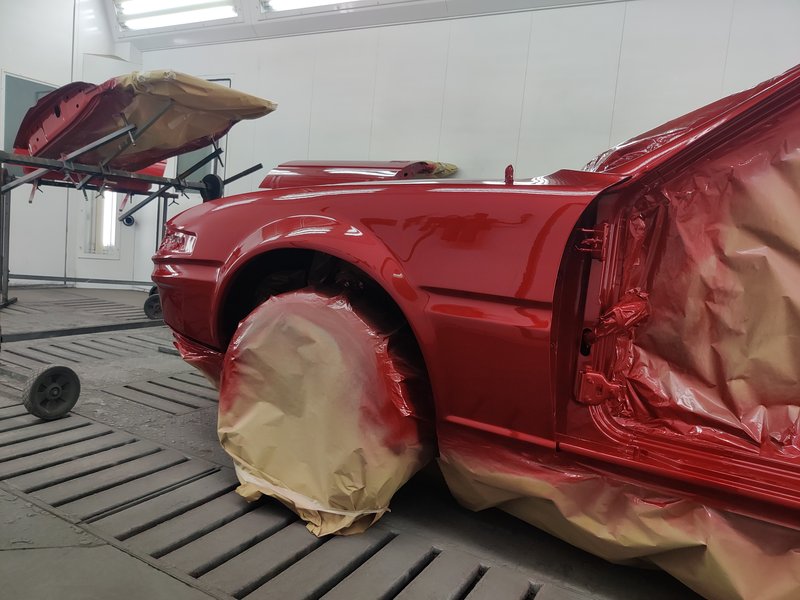
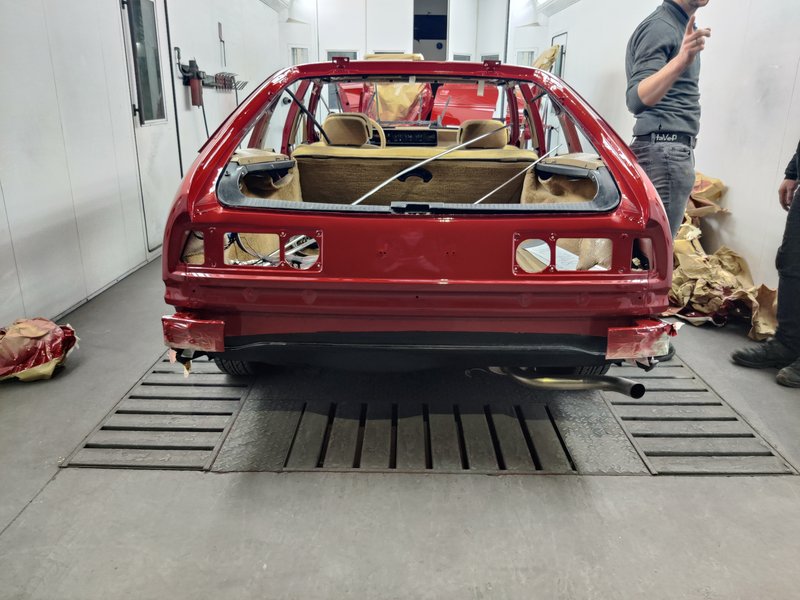
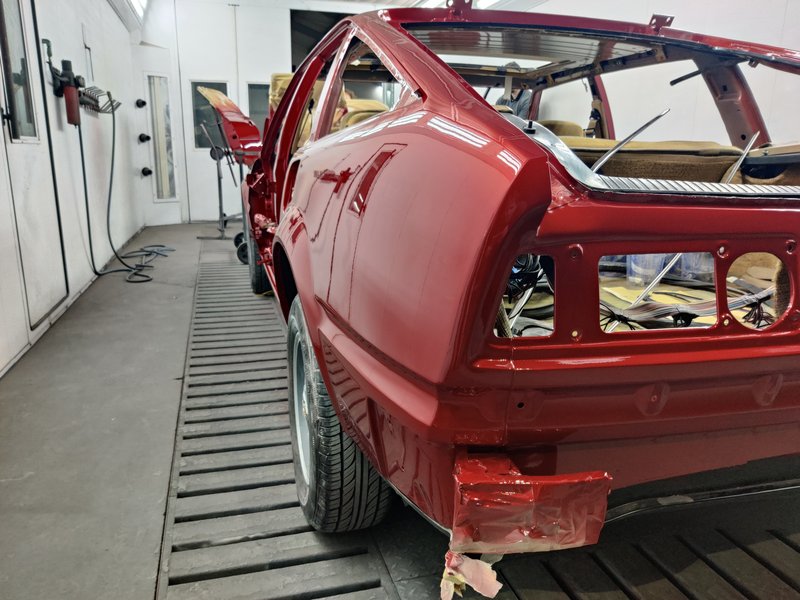
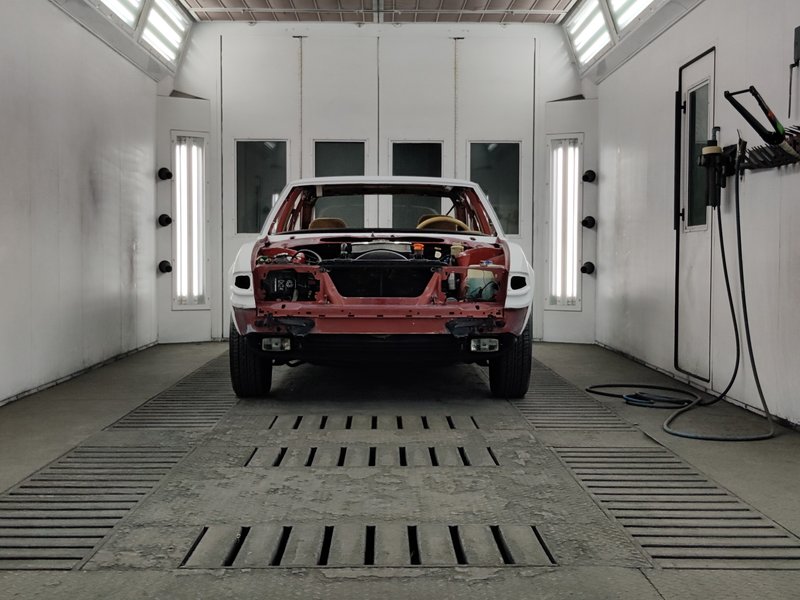
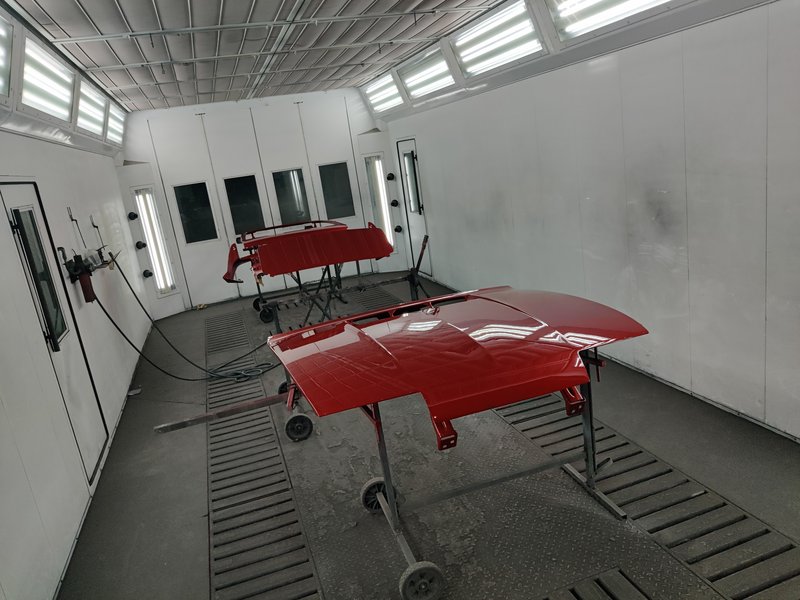
A few days later the other separate panels were painted:
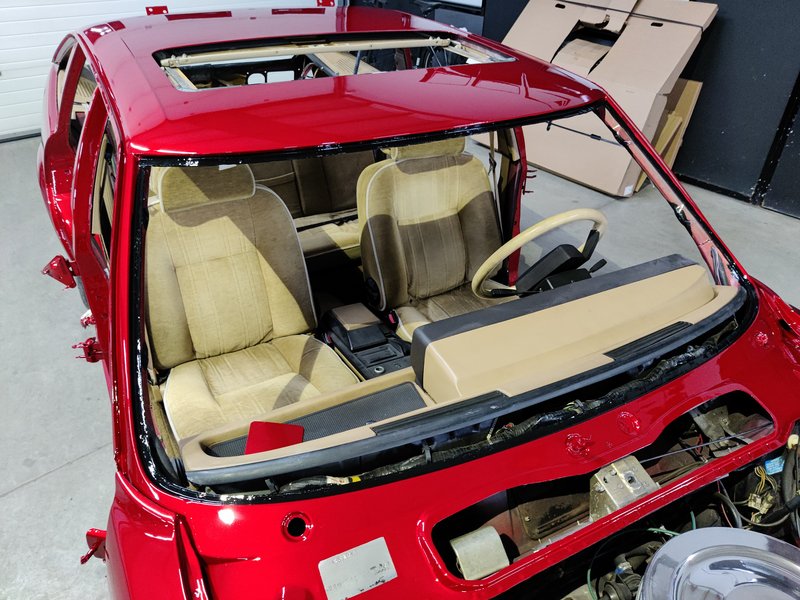
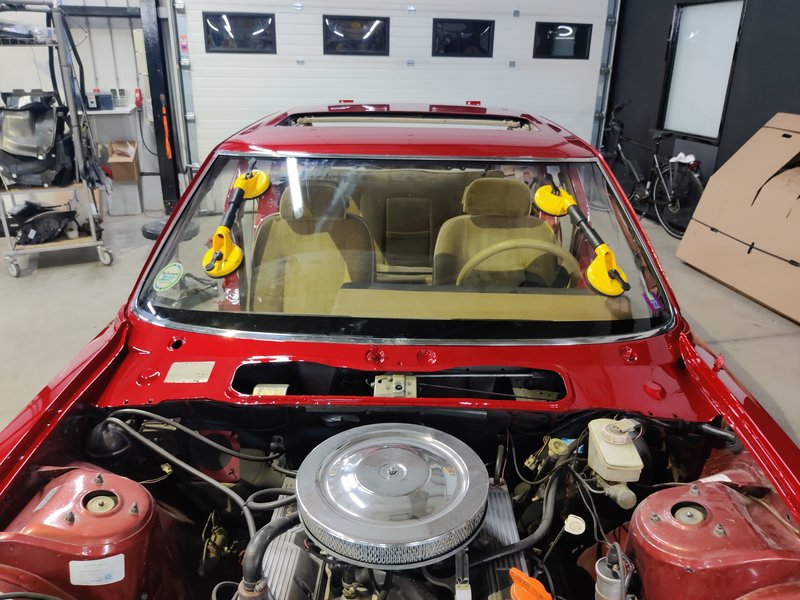
Then, the assembly could begin again! Before we put back the front window, i applied a self etching primer for another coat of protection and good adhesion:
Back in place:
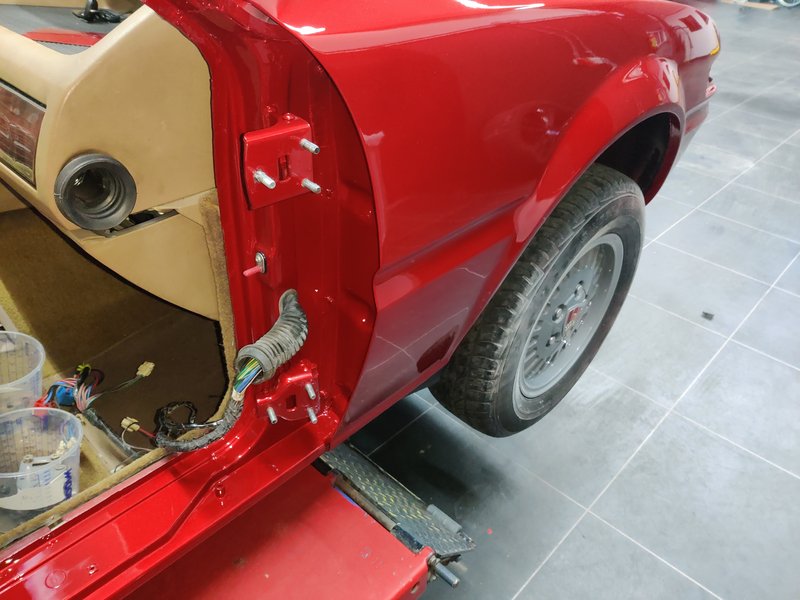
On the top right front door hinge, one of the threads broke of. Cut a bolt and welded that on place (before paint). Before the doors were installed i greased the threads. It all looks nice and fresh again i think!!:
Doors back in place and assembled as far as possible and wit the help of the guys installed the bonnet, bootlid and the glass/ Then i could take the Vanden Plas home again for the rest of the assembly:
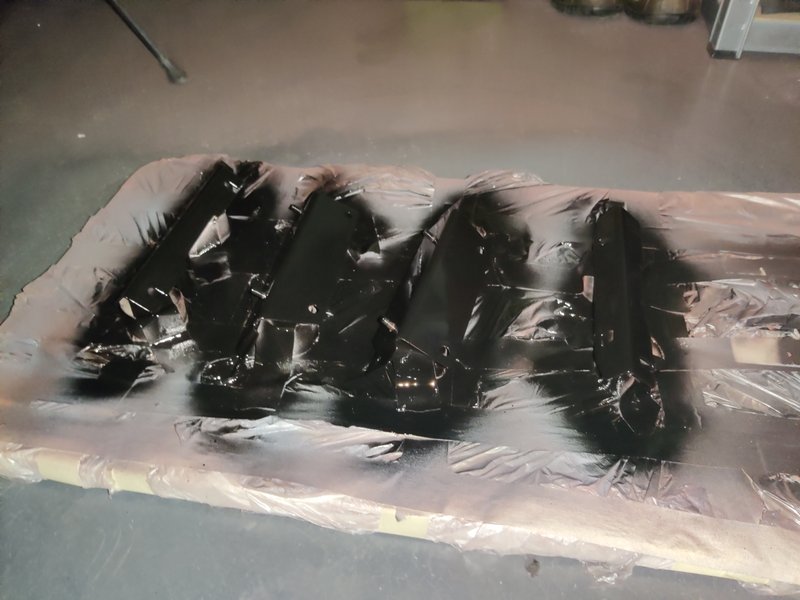
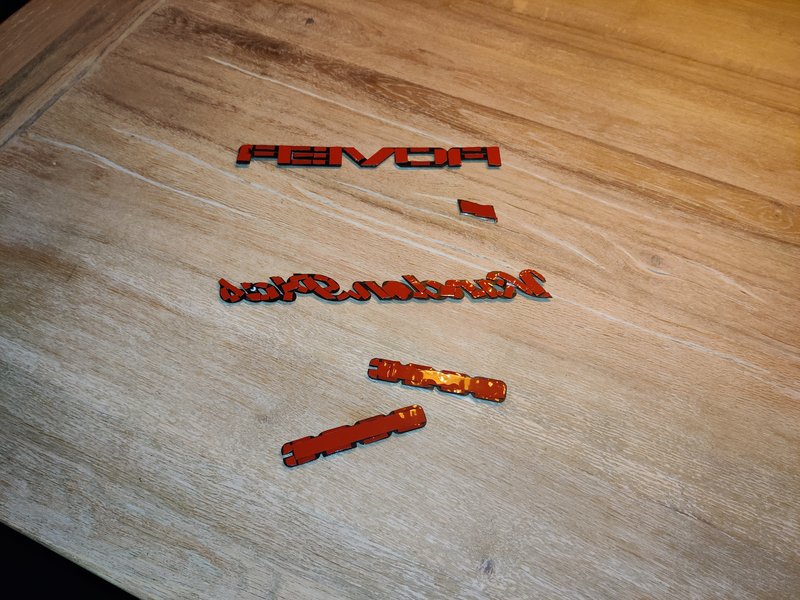
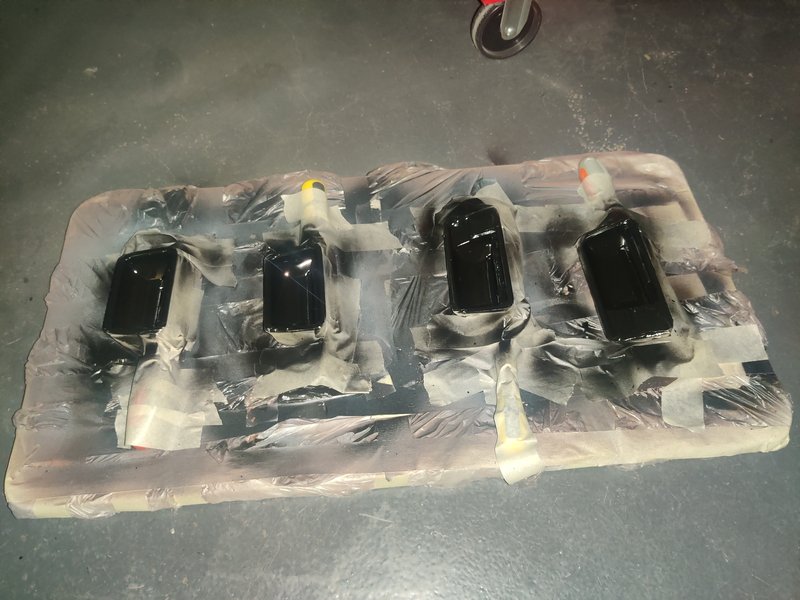
During all this, i prepared everything at home. De rusted brackets, painted them, cleaned and prepared items to go back on the SD1:

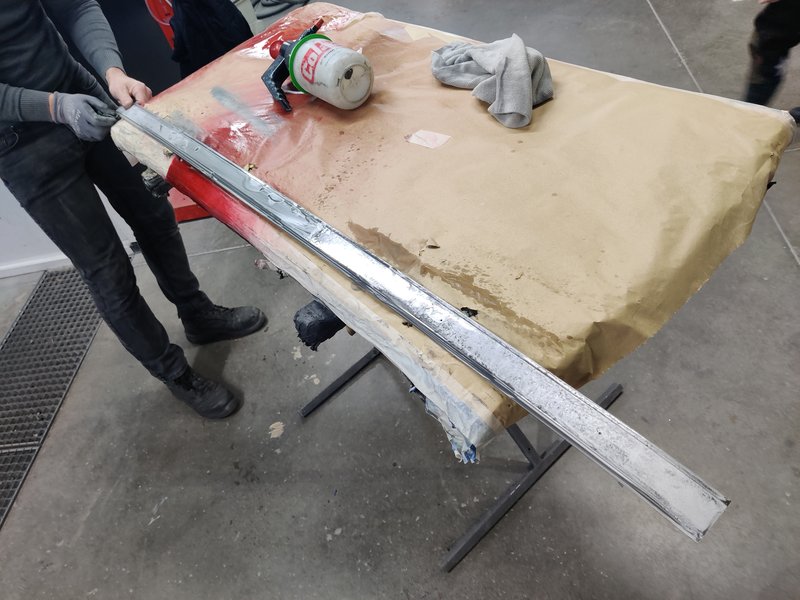
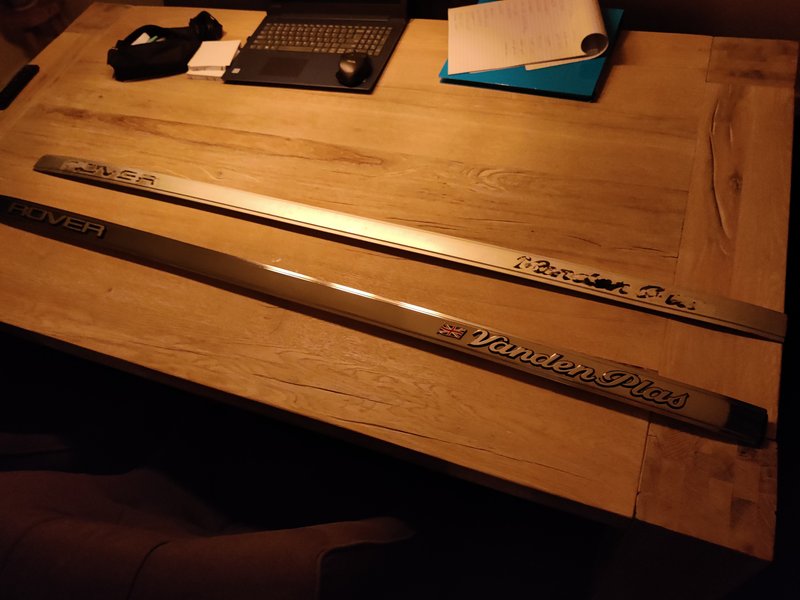
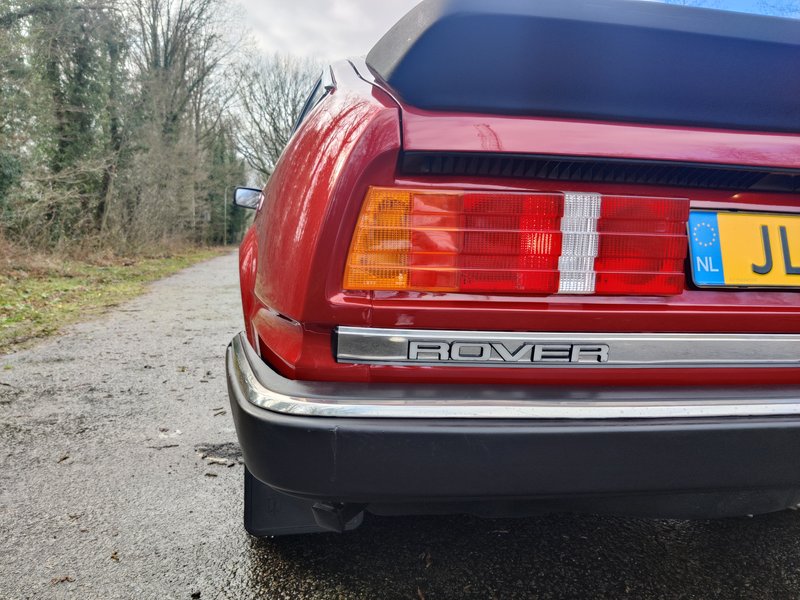
The aluminum strip below the rear lights where ROVER VANDEN PLAS is stated is originally a matt finish because of some coating. I preferred a mirror, chrome like finish so i asked a colleague to polish it to a luster and so he did. Great work!:
Not original i know but better i think!:
B-C pillar covers repaired and painted.
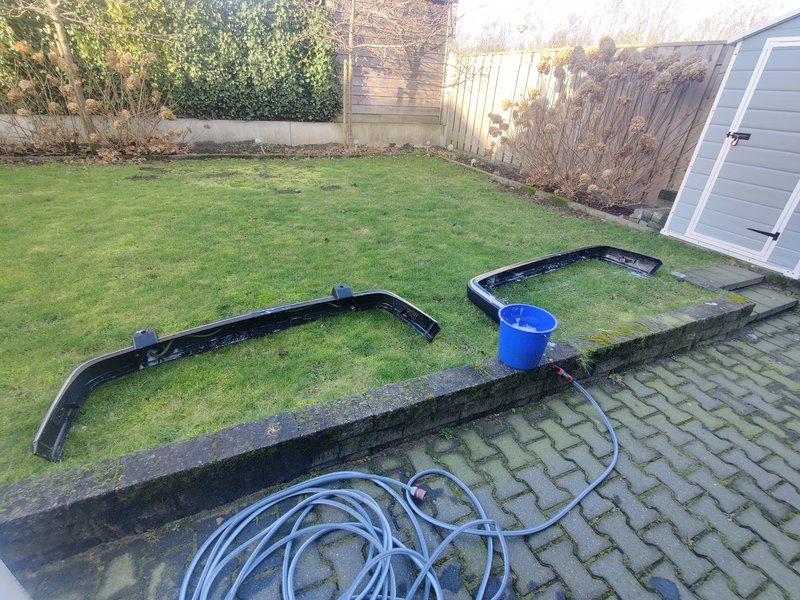
Bumper cleaned inside out and treated:
Assembly:

Before i put back the headlining i checked/tightened the bolts of the sunroof and marked them:
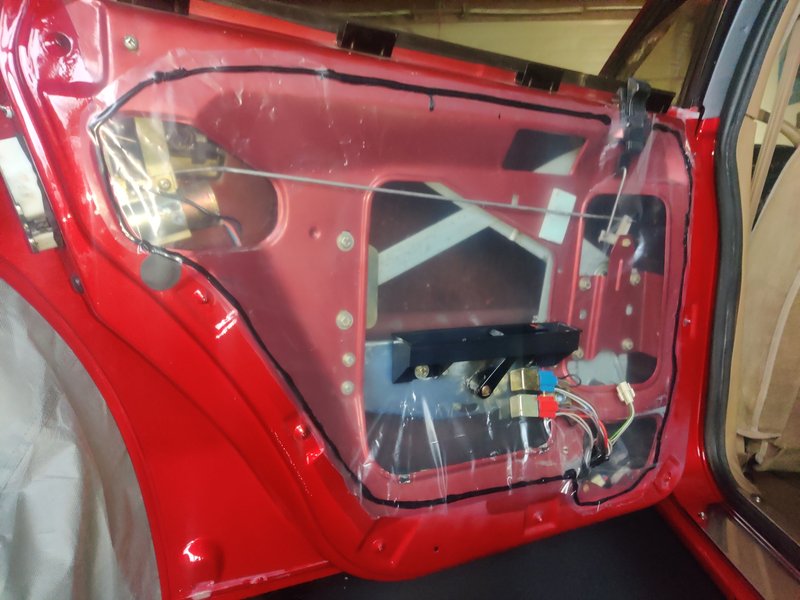
Tightened all the nuts on the doors, cavity waxed the seams, greased the mechanisms, installed new plastic to seal it all properly:

Spray painted the window frames at home:
Cleaned the car, gave it a coat of wax, treated the black trim with creme and then finally, picture time!:
I just cannot thank my colleagues enough! Really amazing and grateful for this great result! And i am very, very lucky that my wife did not mind this. I was away from home many hours after work. Looking forward to the meet season to begin!
https://www.youtube.com/watch?v=HVtoOBm6i7Y
This winter i took the chance to take on a big project. Respray/restore the Rover SD1 Vanden Plas!
People who know my SD1 know that it was a pretty well sorted car. Fresh, good running and enjoyed! But it had 50 shades of red. Besides that, there was some rust spots here and there, some dents and paint blisters on the rear right-side door.
Not an strange list for a 40 year old car i know but even though i love originality, i prefer a fresh look. And my Rover has been touched up anyway so it has been on my mind since i bought it and brought it to the Netherlands.
I talked to my boss and he was oke with me tackling the project. With the help of colleagues of course.
This was the colour i/we decided on:
Yes, indeed that is not the original Oporto. Don't get me wrong, i love originality but to be honest i was never a huge fan of the Oporto red. In my opinion it lacked the depth and vibrant properties i look for, Especially on a classic car with lots of chrome. The series II was sold with three red colours. Monza (non-metallic orange-red), Targa (non-metallic red) and Oporto (metallic red). I wanted Metallic but as said. More to my liking.
Started to take the Rover SD1 apart at home as far as possible:
When i bought the 3500 in Switzerland back in 2016 my friend and i replaced the left front door with a 2nd hand one. The outer skin of the original one had a rust spot on it. The replacement one did not and was in oporto red. So decided to change them out. But, luckily took the original one with me. The replacement door had bad seams, dents, scratches but the original one only the rust spot and a big dent. But that one was structurally sound. So i decided to put back the original one:
Yes, the 827 Vitesse had to come out briefly:
Removed dents from the bonnet with the glue system and removed the large dent under the right tail light with bodyshop tools:
Then to my work to commence with the disassembly and the project:
My work was the disassembly, metal/bodywork and rust removal. My mates would help out with the filler and sanding and the painting. And some difficult things like the windshield etc.
The right front and left rear door were quite good:
Left front welded in the hole. Cleaned the inside of rust as well:
The right side rear door was so bad in terms of paint, we wanted to start fresh and find out what the issue was. Turned out it was bad filler application after a repair:
With some doors the lower seams were rusted or started to bulge a bit. Were needed i removed the top layer of steel so i was certain the rust was gone:
After this, cleaned out the inside of the doors with de greaser and rags and scotched the inner side that will receive paint:
The bonnet and tailgate received the same treatment. The tailgate needed some minor holes welded.
We also took out the front window because i wanted to clean it all. Just in the nick of time! I could clean it all out with tools but it would not have survived for five more years i think. All cleaned to bare metal and treated with rust converter. So now in the clear i hope!:
De rusted the sun roof plate:
When i looked at the car at this point, the size of the project did hit me:
Proceed! The car in blocking/sanding paint:
After the sanding steps, seam sealing, degreasing it was time for the big day!:
The colour:
Clear coat:
A few days later the other separate panels were painted:
Then, the assembly could begin again! Before we put back the front window, i applied a self etching primer for another coat of protection and good adhesion:
Back in place:
On the top right front door hinge, one of the threads broke of. Cut a bolt and welded that on place (before paint). Before the doors were installed i greased the threads. It all looks nice and fresh again i think!!:
Doors back in place and assembled as far as possible and wit the help of the guys installed the bonnet, bootlid and the glass/ Then i could take the Vanden Plas home again for the rest of the assembly:
During all this, i prepared everything at home. De rusted brackets, painted them, cleaned and prepared items to go back on the SD1:
The aluminum strip below the rear lights where ROVER VANDEN PLAS is stated is originally a matt finish because of some coating. I preferred a mirror, chrome like finish so i asked a colleague to polish it to a luster and so he did. Great work!:
Not original i know but better i think!:
B-C pillar covers repaired and painted.
Bumper cleaned inside out and treated:
Assembly:
Before i put back the headlining i checked/tightened the bolts of the sunroof and marked them:
Tightened all the nuts on the doors, cavity waxed the seams, greased the mechanisms, installed new plastic to seal it all properly:
Spray painted the window frames at home:
Cleaned the car, gave it a coat of wax, treated the black trim with creme and then finally, picture time!:
I just cannot thank my colleagues enough! Really amazing and grateful for this great result! And i am very, very lucky that my wife did not mind this. I was away from home many hours after work. Looking forward to the meet season to begin!
https://www.youtube.com/watch?v=HVtoOBm6i7Y
Last edited by Marc-827-Vitesse on Sat Apr 13, 2024 2:20 pm, edited 1 time in total.
1989 Rover 827 Vitesse.
1982 Rover 3500 Vanden Plas.
1982 Rover 3500 Vanden Plas.
-
scoobyh123
- Rover Guru
- Posts: 12156
- Joined: Sat Jul 11, 2009 10:27 pm
- Location: Next door to Top Gun, Suffolk
- Contact:
Re: 1982 Rover 3500 V8 Vanden Plas automatic.
Great stuff Marc! I did comment on your video  as well!
Cheers,
Dave
'02 Honda CR-V SE Executive
'99 Jag S Type 3.0 V6 SE
'94 827 Sterling saloon
'88 Volvo 760 V6 Estate
'95 827 Coupé LPG gone but not forgotten!
Dave
'02 Honda CR-V SE Executive
'99 Jag S Type 3.0 V6 SE
'94 827 Sterling saloon
'88 Volvo 760 V6 Estate
'95 827 Coupé LPG gone but not forgotten!
-
Marc-827-Vitesse
- Rover Guru
- Posts: 730
- Joined: Sun Feb 24, 2013 12:42 pm
- Location: Netherlands. [phpBB Debug] PHP Warning: in file [ROOT]/vendor/twig/twig/lib/Twig/Extension/Core.php on line 1266: count(): Parameter must be an array or an object that implements Countable
Re: 1982 Rover 3500 V8 Vanden Plas automatic.
Thanks Dave! Yeah i know! Thanks again.
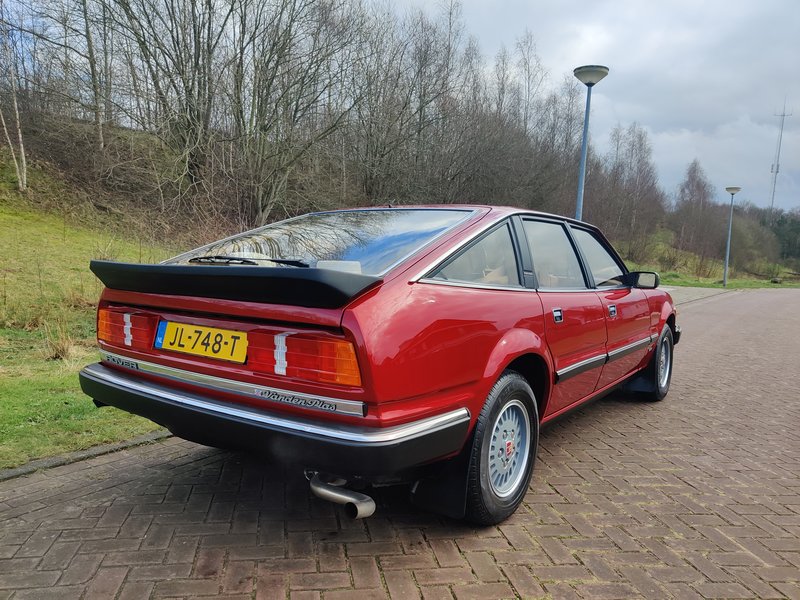
Some pictures with proper sunshine!:
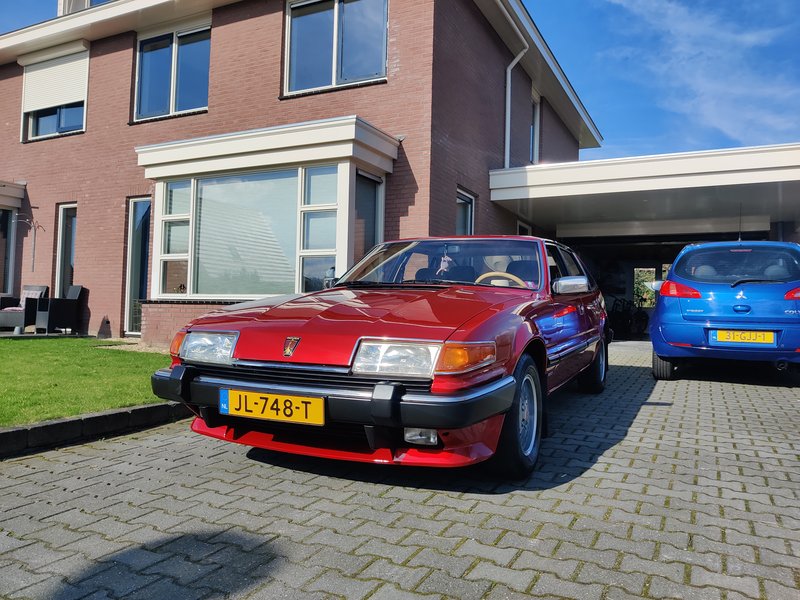
Some pictures with proper sunshine!:
1989 Rover 827 Vitesse.
1982 Rover 3500 Vanden Plas.
1982 Rover 3500 Vanden Plas.
-
Lodein
- Regular Visitor
- Posts: 452
- Joined: Tue Jul 21, 2020 4:55 pm
- Location: Angoulême / France [phpBB Debug] PHP Warning: in file [ROOT]/vendor/twig/twig/lib/Twig/Extension/Core.php on line 1266: count(): Parameter must be an array or an object that implements Countable
Re: 1982 Rover 3500 V8 Vanden Plas automatic.
Congratulations for this very big job and for the very very good result, it is better than new
So the new color came from whitch car ?
Lodein
So the new color came from whitch car ?
Lodein
Rover 827 Sterling Option Pack 1989 (Non Cat / Manual)
-
Marc-827-Vitesse
- Rover Guru
- Posts: 730
- Joined: Sun Feb 24, 2013 12:42 pm
- Location: Netherlands. [phpBB Debug] PHP Warning: in file [ROOT]/vendor/twig/twig/lib/Twig/Extension/Core.php on line 1266: count(): Parameter must be an array or an object that implements Countable
Re: 1982 Rover 3500 V8 Vanden Plas automatic.
Thank you very much Lodein! Very kind.
The new colour I saw it on a Seat Ateca.
Cheers,
Marc
1989 Rover 827 Vitesse.
1982 Rover 3500 Vanden Plas.
1982 Rover 3500 Vanden Plas.
-
Marc-827-Vitesse
- Rover Guru
- Posts: 730
- Joined: Sun Feb 24, 2013 12:42 pm
- Location: Netherlands. [phpBB Debug] PHP Warning: in file [ROOT]/vendor/twig/twig/lib/Twig/Extension/Core.php on line 1266: count(): Parameter must be an array or an object that implements Countable
Re: 1982 Rover 3500 V8 Vanden Plas automatic.
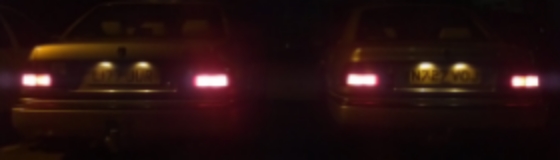
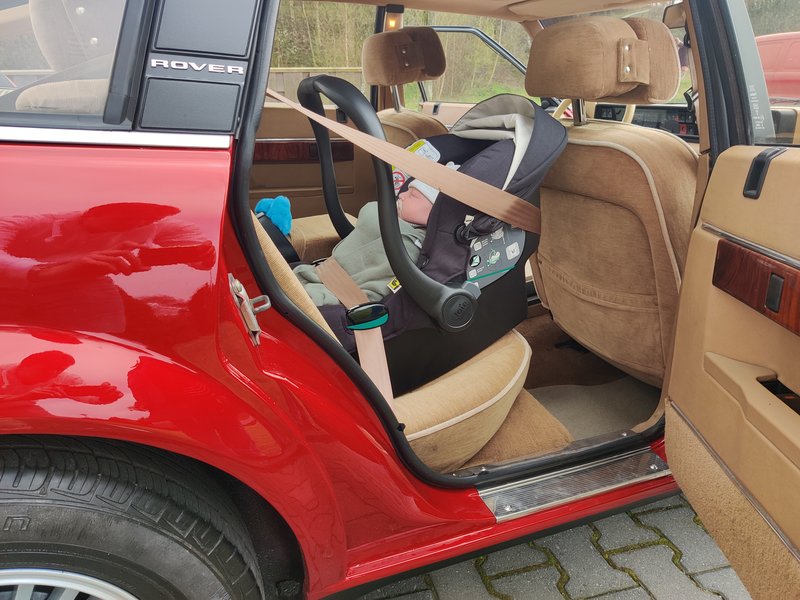
During easter weekend there was a mostly US car meet. Other classics were welcome to join. I went with my 3500 Vanden Plas.
It was special because it was the first event after the respray but most of all it was special because we were joined by a special guest. 8 march, my wife gave birth to our baby boy Gijs. Comfy in the SD1:
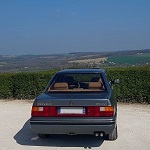
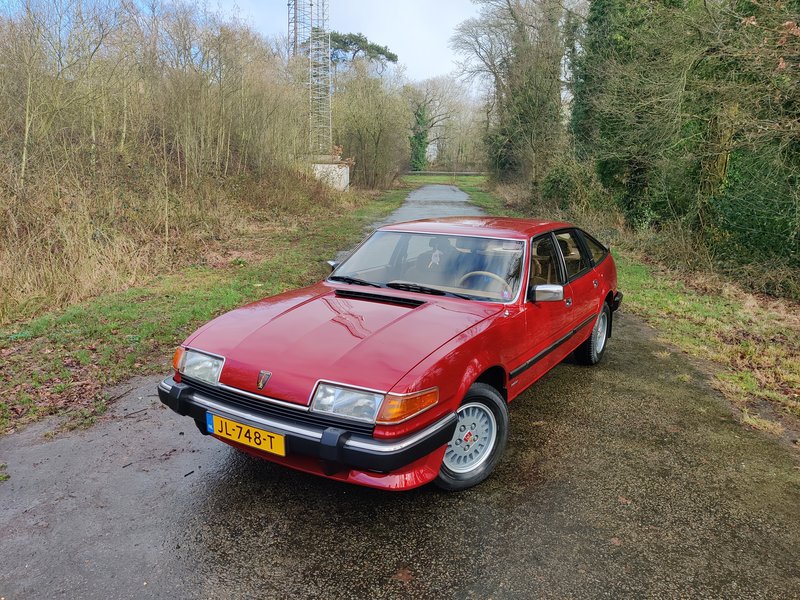
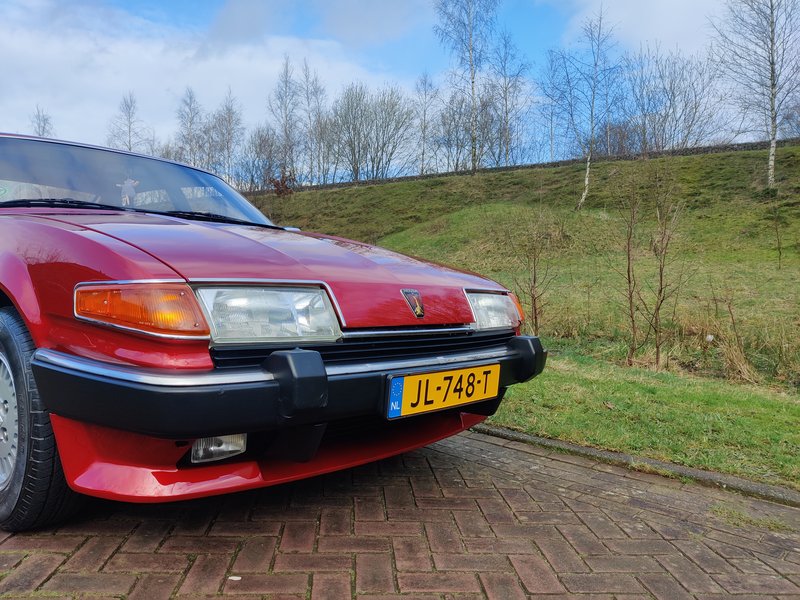
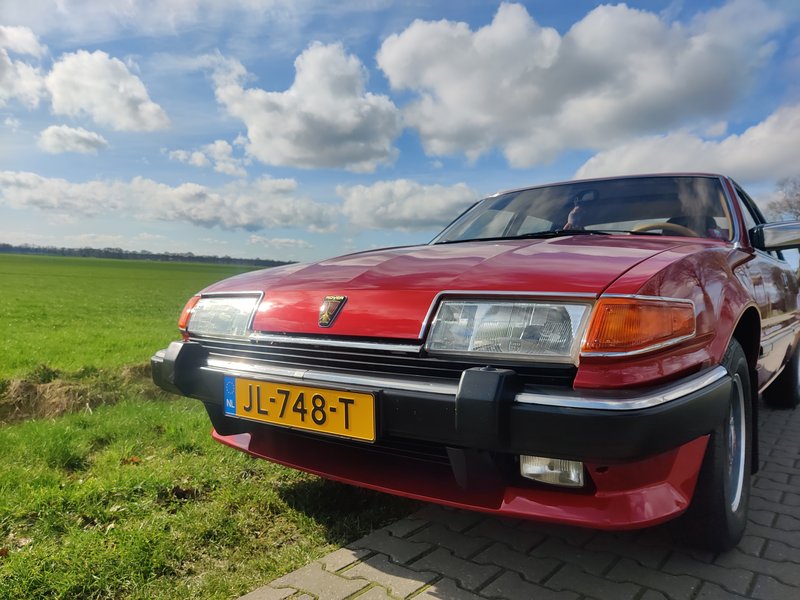
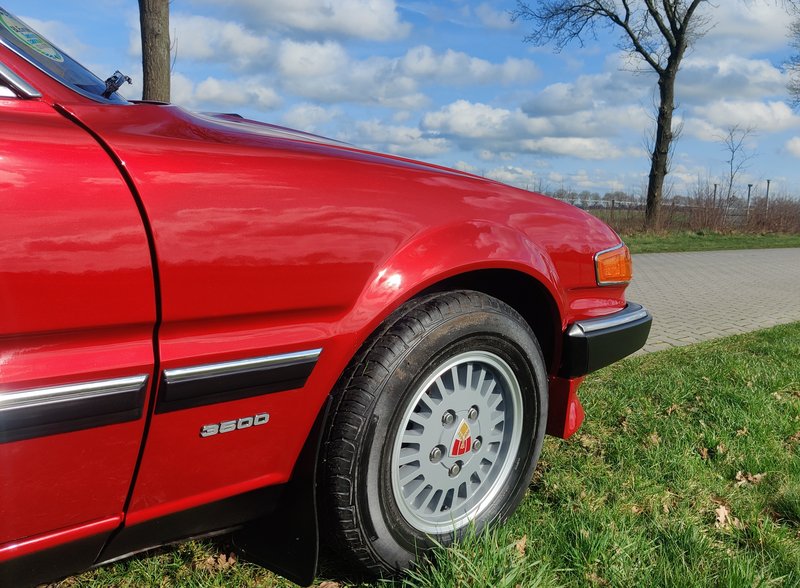
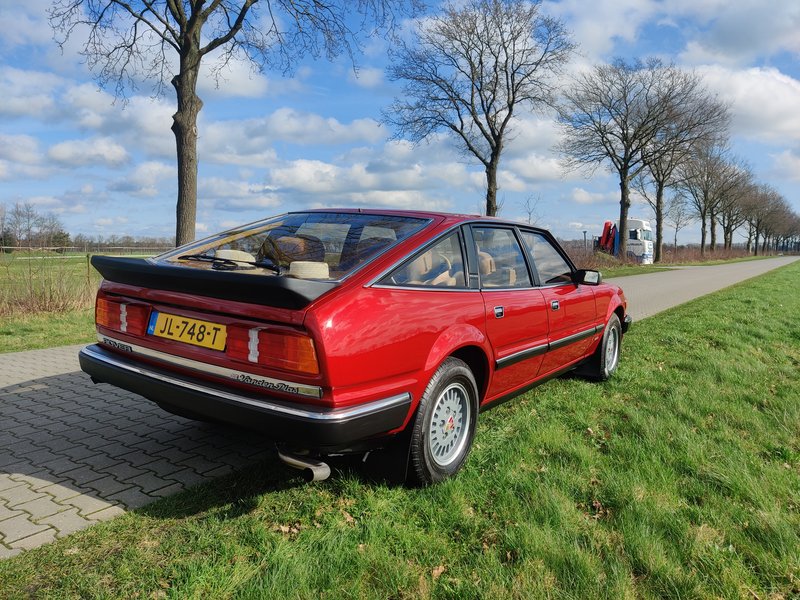
At the meet you can see the colour proper. Taken with a decent camera instead of my phone camera haha. Still so happy with the result!!:

There was a lot to see!:
https://www.youtube.com/watch?v=weHbkEKN-3E
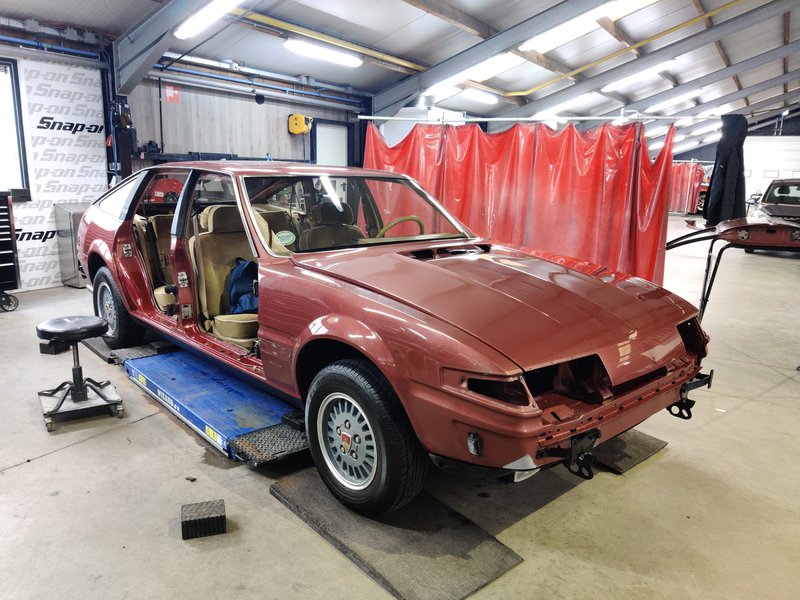
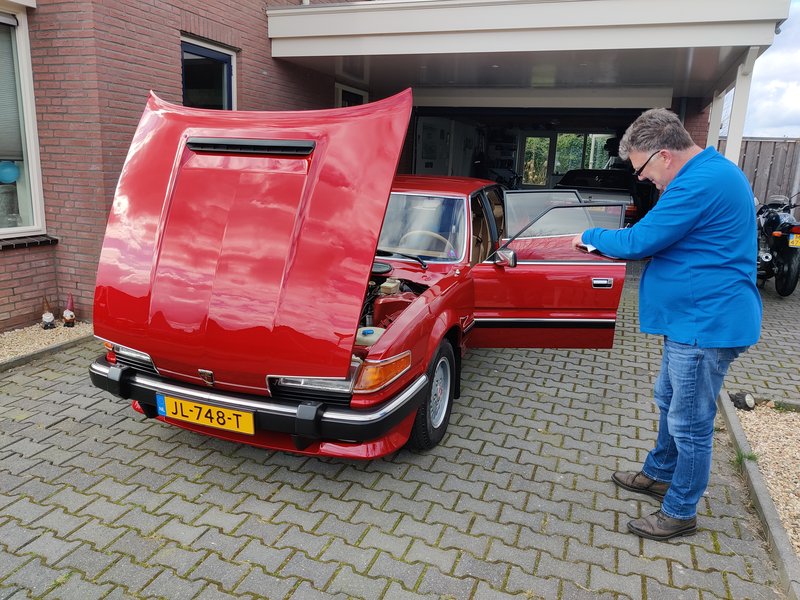
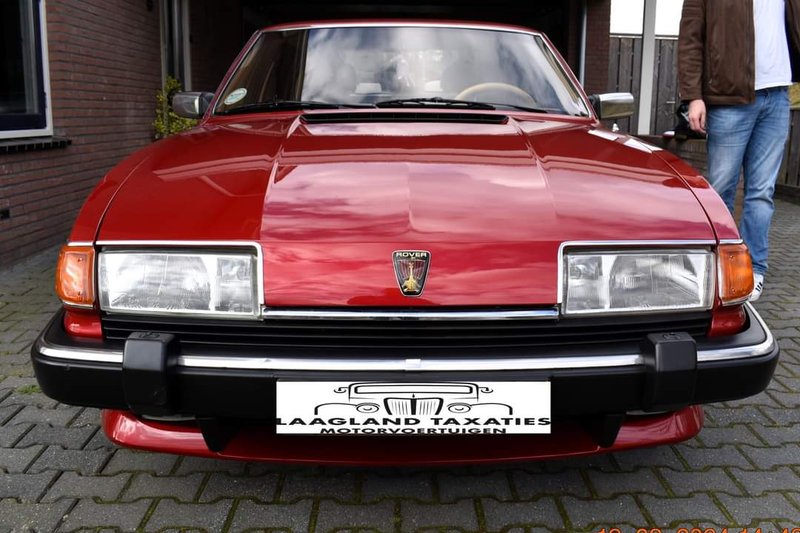
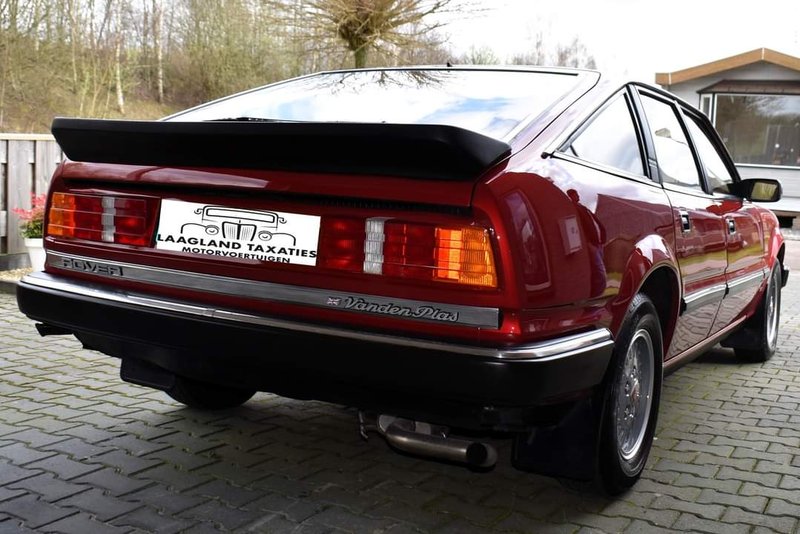
Because the Rover 3500 Vanden Plas was recently restored, i decided to have it appraised for the insurance a bit early:
It was special because it was the first event after the respray but most of all it was special because we were joined by a special guest. 8 march, my wife gave birth to our baby boy Gijs. Comfy in the SD1:
At the meet you can see the colour proper. Taken with a decent camera instead of my phone camera haha. Still so happy with the result!!:
There was a lot to see!:
https://www.youtube.com/watch?v=weHbkEKN-3E
Because the Rover 3500 Vanden Plas was recently restored, i decided to have it appraised for the insurance a bit early:
Last edited by Marc-827-Vitesse on Sat Apr 13, 2024 2:22 pm, edited 1 time in total.
1989 Rover 827 Vitesse.
1982 Rover 3500 Vanden Plas.
1982 Rover 3500 Vanden Plas.
-
scoobyh123
- Rover Guru
- Posts: 12156
- Joined: Sat Jul 11, 2009 10:27 pm
- Location: Next door to Top Gun, Suffolk
- Contact:
Re: 1982 Rover 3500 V8 Vanden Plas automatic.
Excellent pics as always Marc and congrats to you and your wife on the birth of Gijs!
Glad to see you're training him in the art of Rover appreciation from a young age!
Glad to see you're training him in the art of Rover appreciation from a young age!
Cheers,
Dave
'02 Honda CR-V SE Executive
'99 Jag S Type 3.0 V6 SE
'94 827 Sterling saloon
'88 Volvo 760 V6 Estate
'95 827 Coupé LPG gone but not forgotten!
Dave
'02 Honda CR-V SE Executive
'99 Jag S Type 3.0 V6 SE
'94 827 Sterling saloon
'88 Volvo 760 V6 Estate
'95 827 Coupé LPG gone but not forgotten!
-
Lodein
- Regular Visitor
- Posts: 452
- Joined: Tue Jul 21, 2020 4:55 pm
- Location: Angoulême / France [phpBB Debug] PHP Warning: in file [ROOT]/vendor/twig/twig/lib/Twig/Extension/Core.php on line 1266: count(): Parameter must be an array or an object that implements Countable
Re: 1982 Rover 3500 V8 Vanden Plas automatic.
Thank you for the beautiful pictures, and again congratulations for your son
Your Rover 3500 Vanden Plas is very beatifull
Lodein
Your Rover 3500 Vanden Plas is very beatifull
Lodein
Rover 827 Sterling Option Pack 1989 (Non Cat / Manual)
-
Marc-827-Vitesse
- Rover Guru
- Posts: 730
- Joined: Sun Feb 24, 2013 12:42 pm
- Location: Netherlands. [phpBB Debug] PHP Warning: in file [ROOT]/vendor/twig/twig/lib/Twig/Extension/Core.php on line 1266: count(): Parameter must be an array or an object that implements Countable
Re: 1982 Rover 3500 V8 Vanden Plas automatic.
Thank you so much Lodein! Glad you liked the pictures as well.
1989 Rover 827 Vitesse.
1982 Rover 3500 Vanden Plas.
1982 Rover 3500 Vanden Plas.
-
Marc-827-Vitesse
- Rover Guru
- Posts: 730
- Joined: Sun Feb 24, 2013 12:42 pm
- Location: Netherlands. [phpBB Debug] PHP Warning: in file [ROOT]/vendor/twig/twig/lib/Twig/Extension/Core.php on line 1266: count(): Parameter must be an array or an object that implements Countable
Re: 1982 Rover 3500 V8 Vanden Plas automatic.
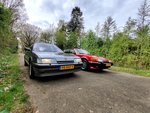
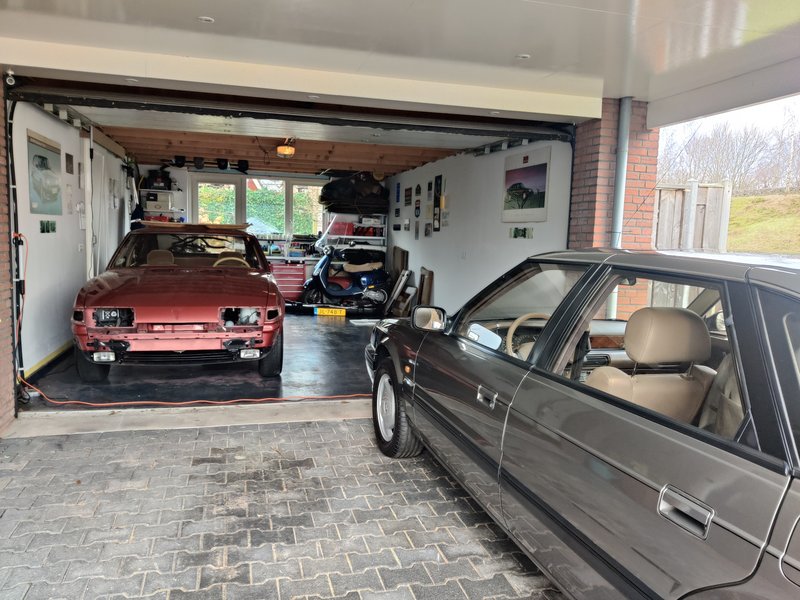
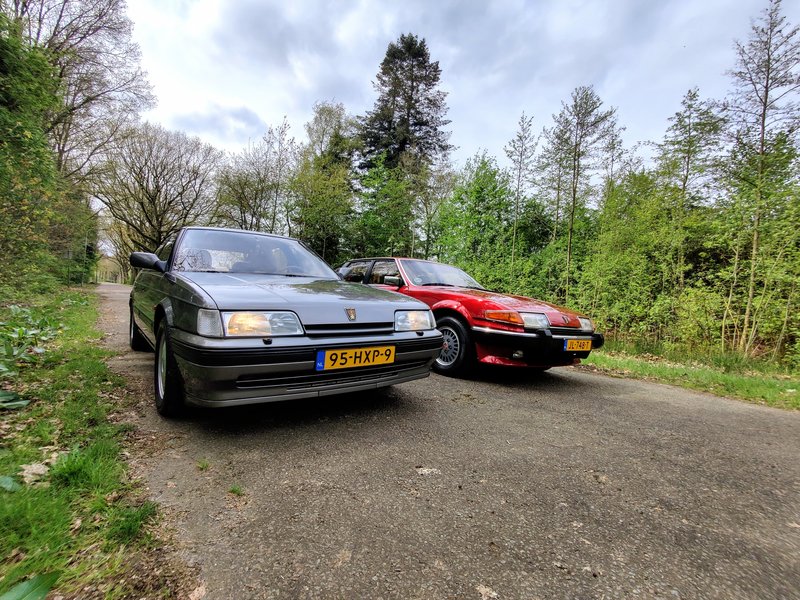
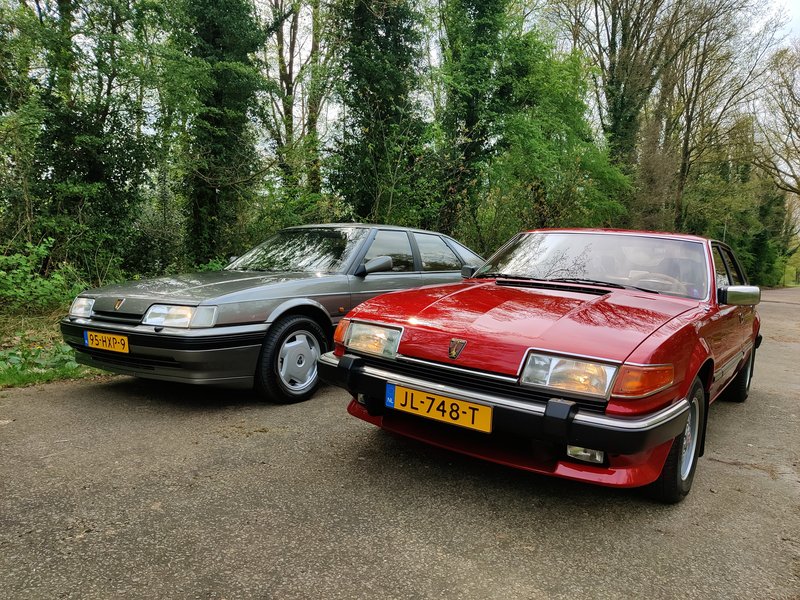
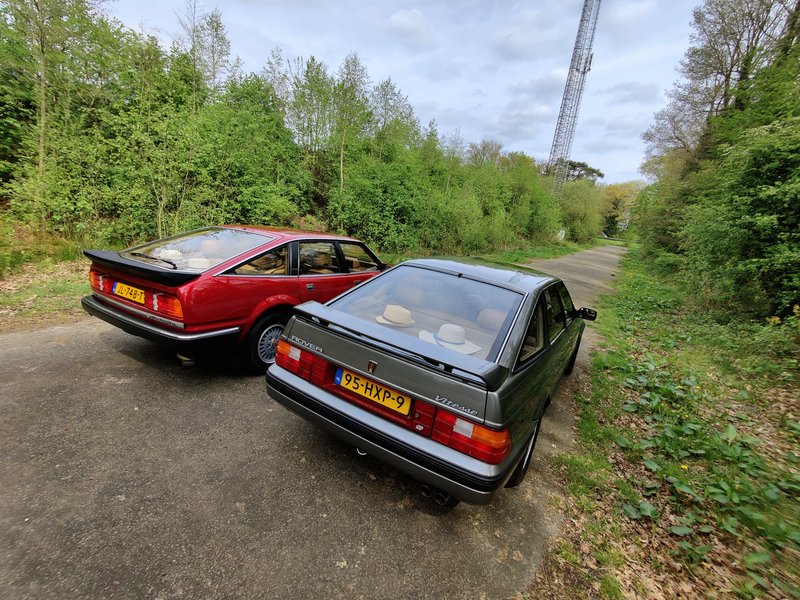
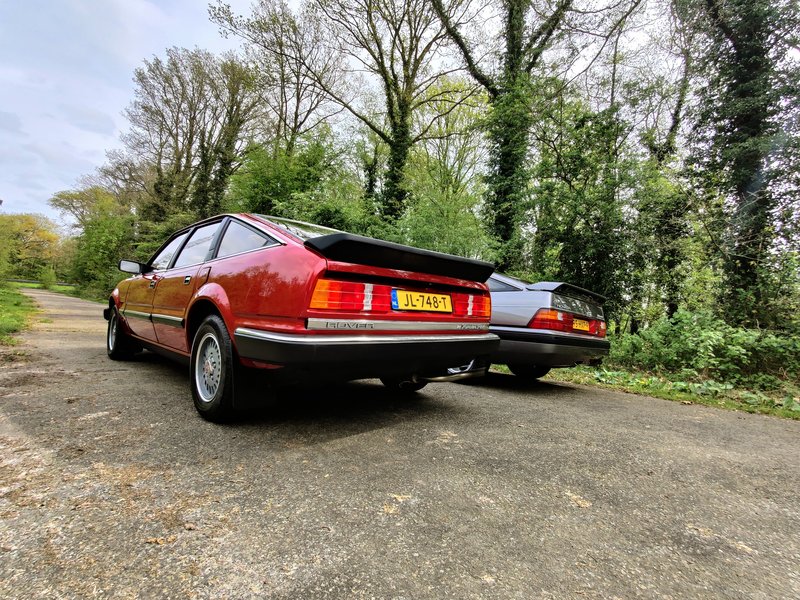
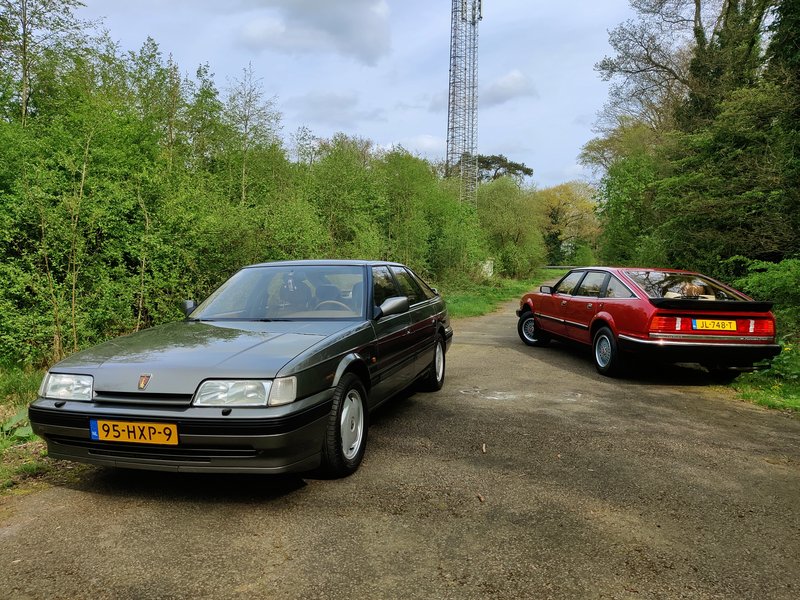
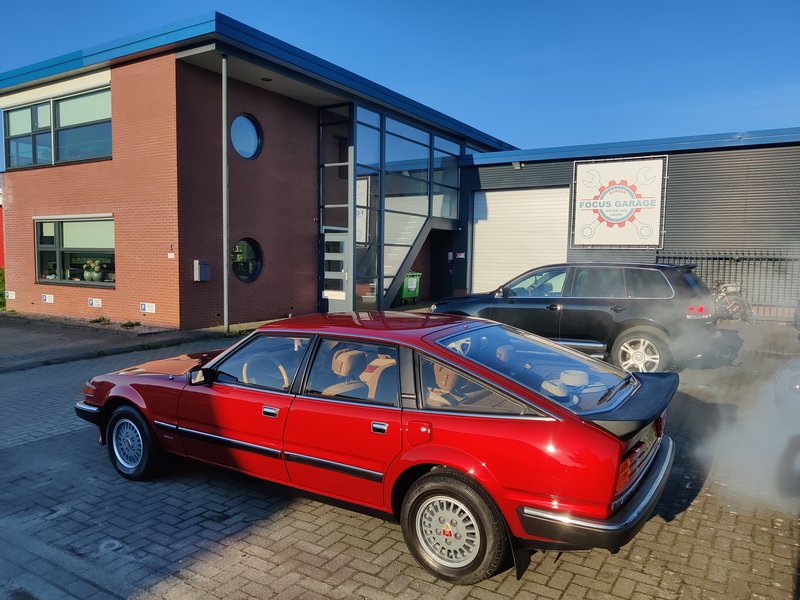
Some pictures of my Rovers together! Now with the SD1 looking fresh as well!:
The 3500 Vanden Plas passed its MOT in one go so 2 years MOT is a fact for the SD1 as well!:
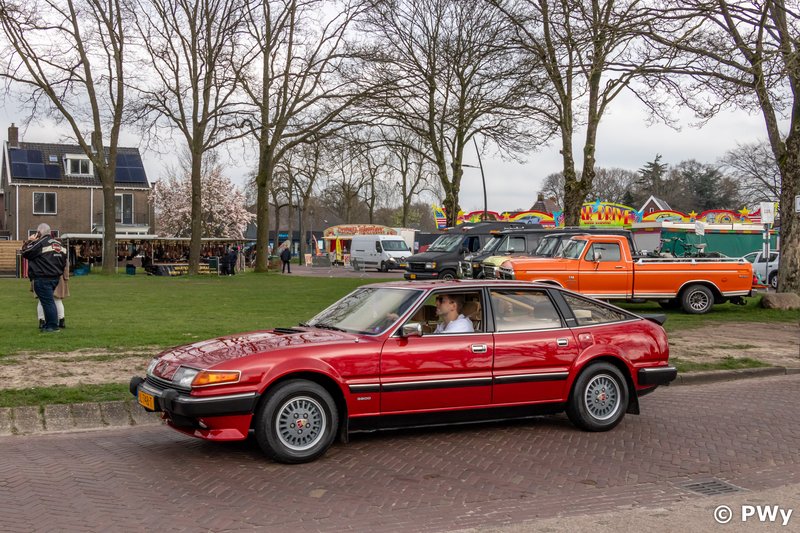
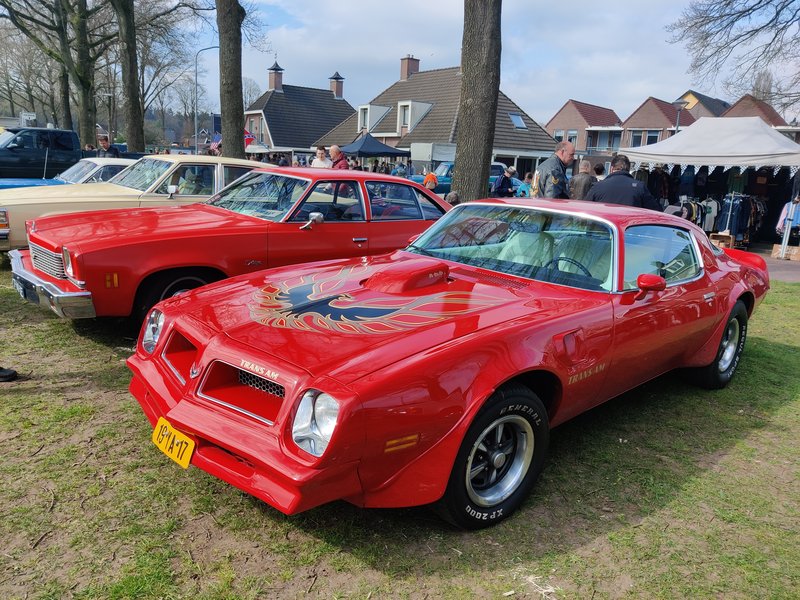
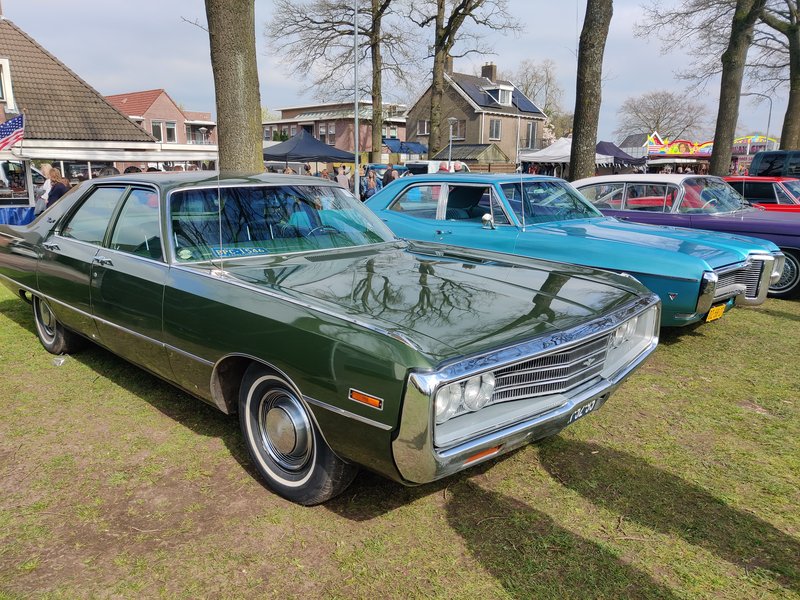
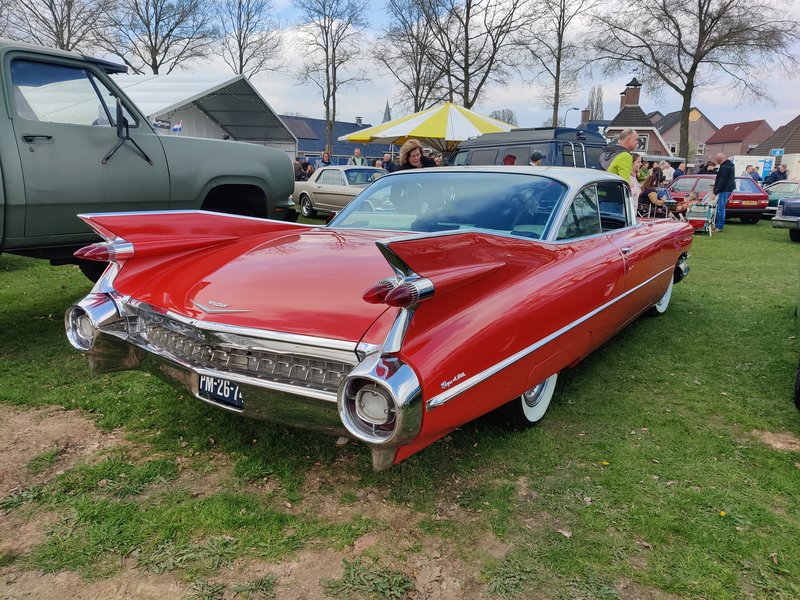
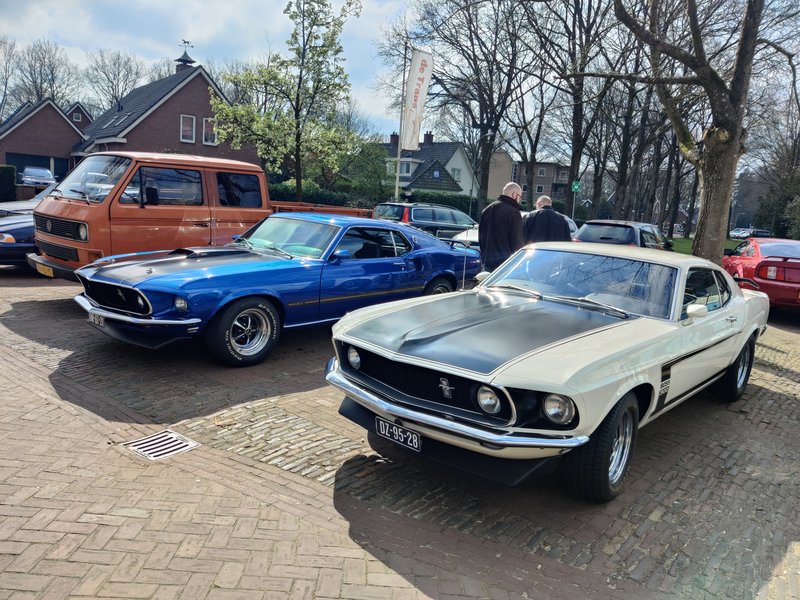
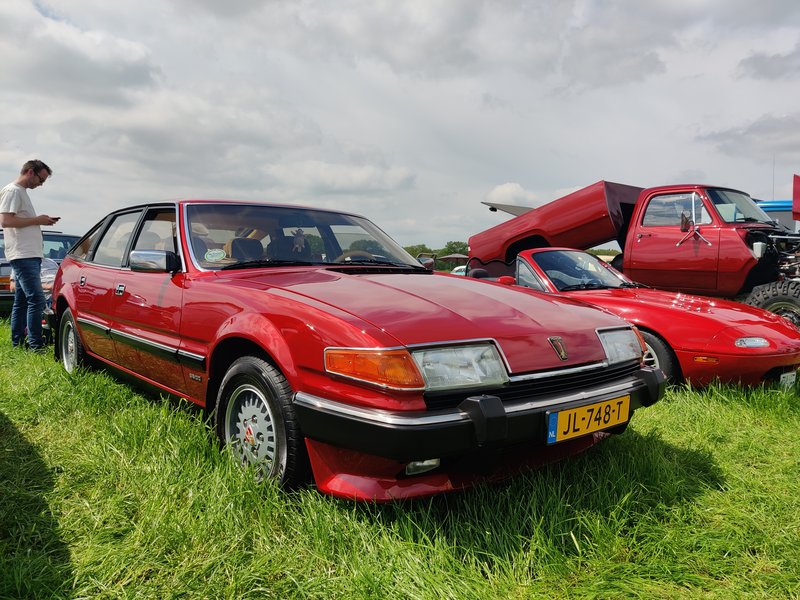
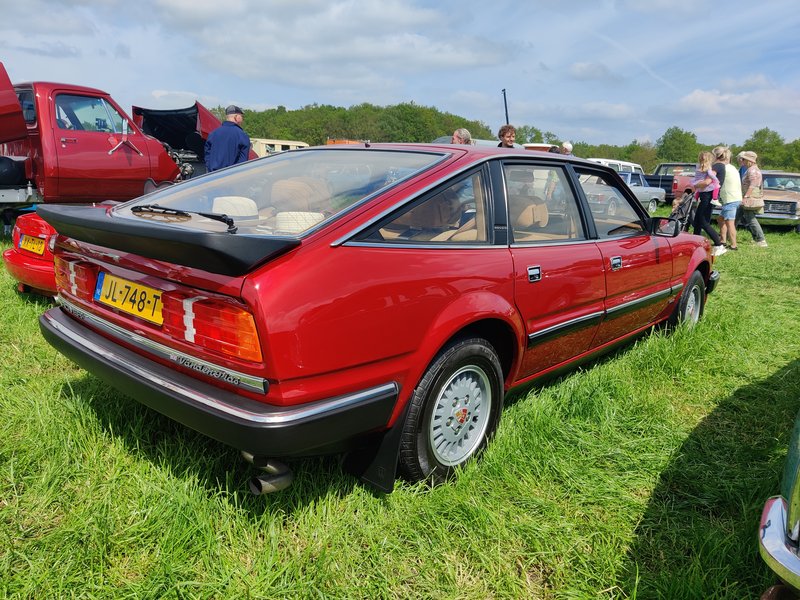
I took my Rover 3500 Vanden Plas to a huge car event in Hoornsterzwaag Friesland. Lovely show!:
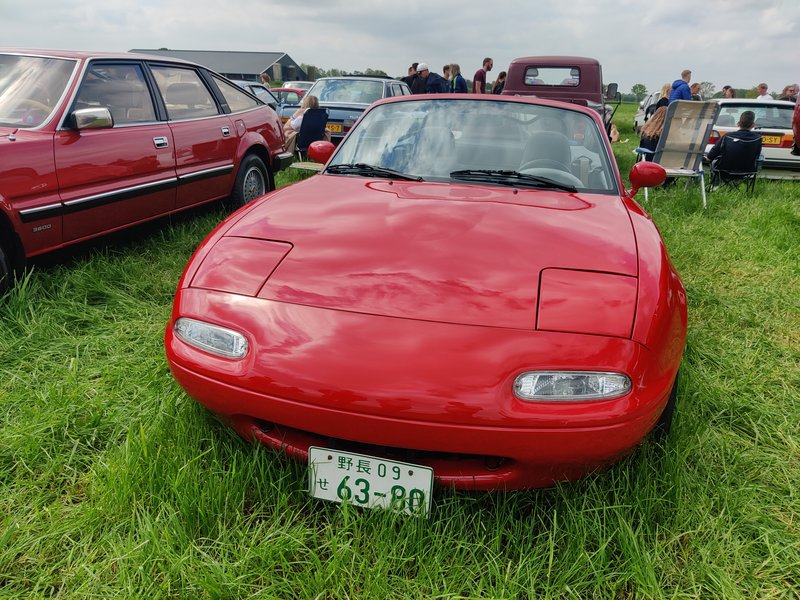

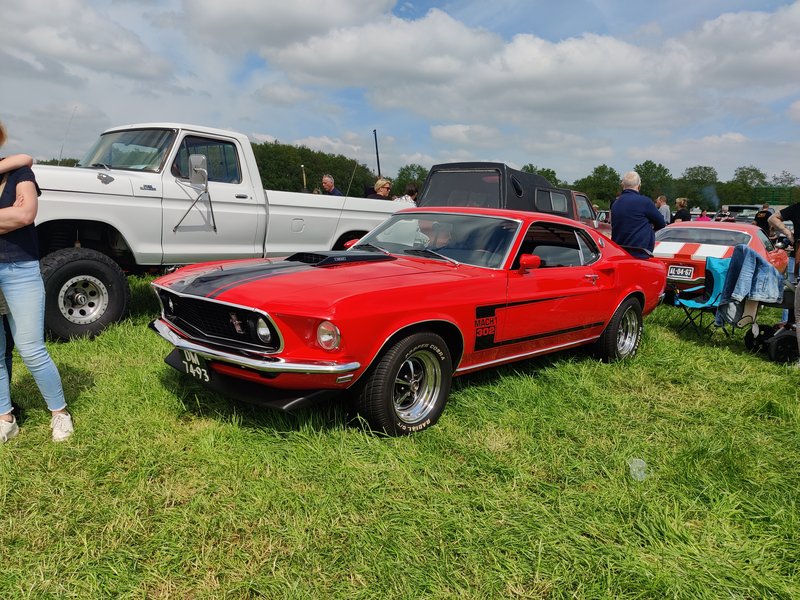
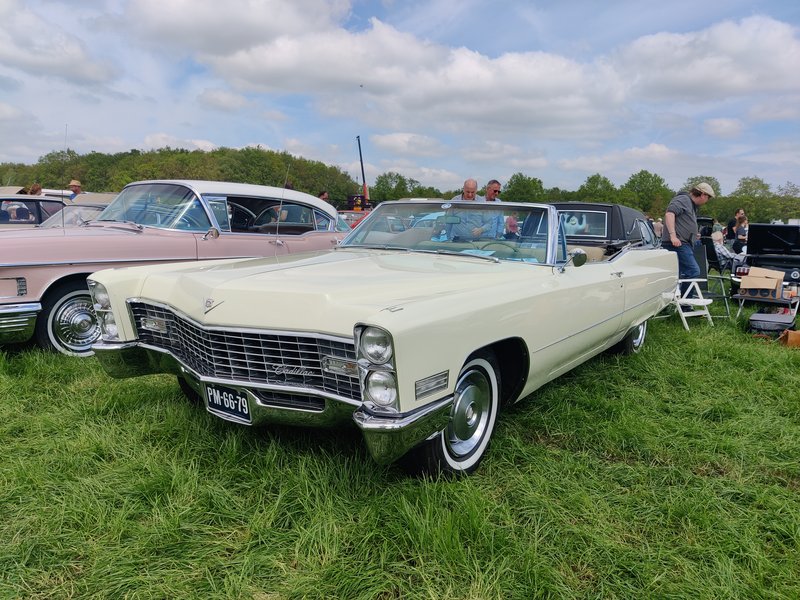
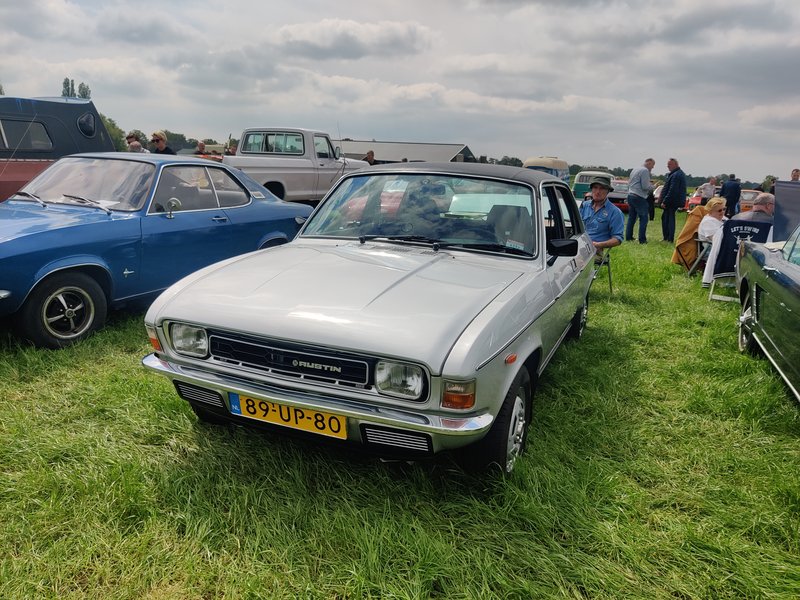
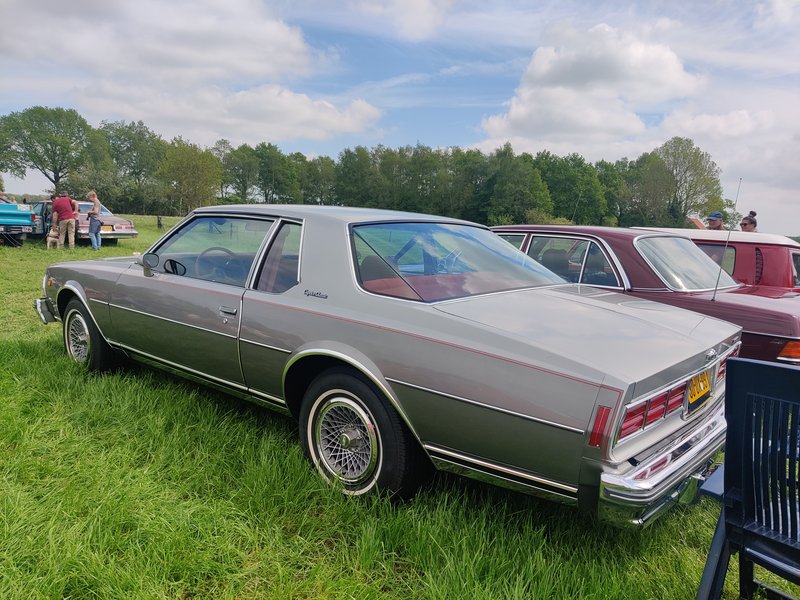
Chilling in the sun!:

The 3500 Vanden Plas passed its MOT in one go so 2 years MOT is a fact for the SD1 as well!:
I took my Rover 3500 Vanden Plas to a huge car event in Hoornsterzwaag Friesland. Lovely show!:
Chilling in the sun!:
1989 Rover 827 Vitesse.
1982 Rover 3500 Vanden Plas.
1982 Rover 3500 Vanden Plas.
Who is online
Users browsing this forum: No registered users and 1 guest